Monday 25 February 2019

three versions of the Ruska dress (Breaking the Pattern)

I pre-ordered Named's first book basically as soon as I could find somewhere other than Amazon taking pre-orders. I ended up getting the book several weeks before its official release date (I saw a few people talking about this so I think there must have been a miscommunication somewhere), and at first read-through I didn't think I'd actually end up making anything. I just couldn't imagine any of the garments working with my aesthetic or my body.

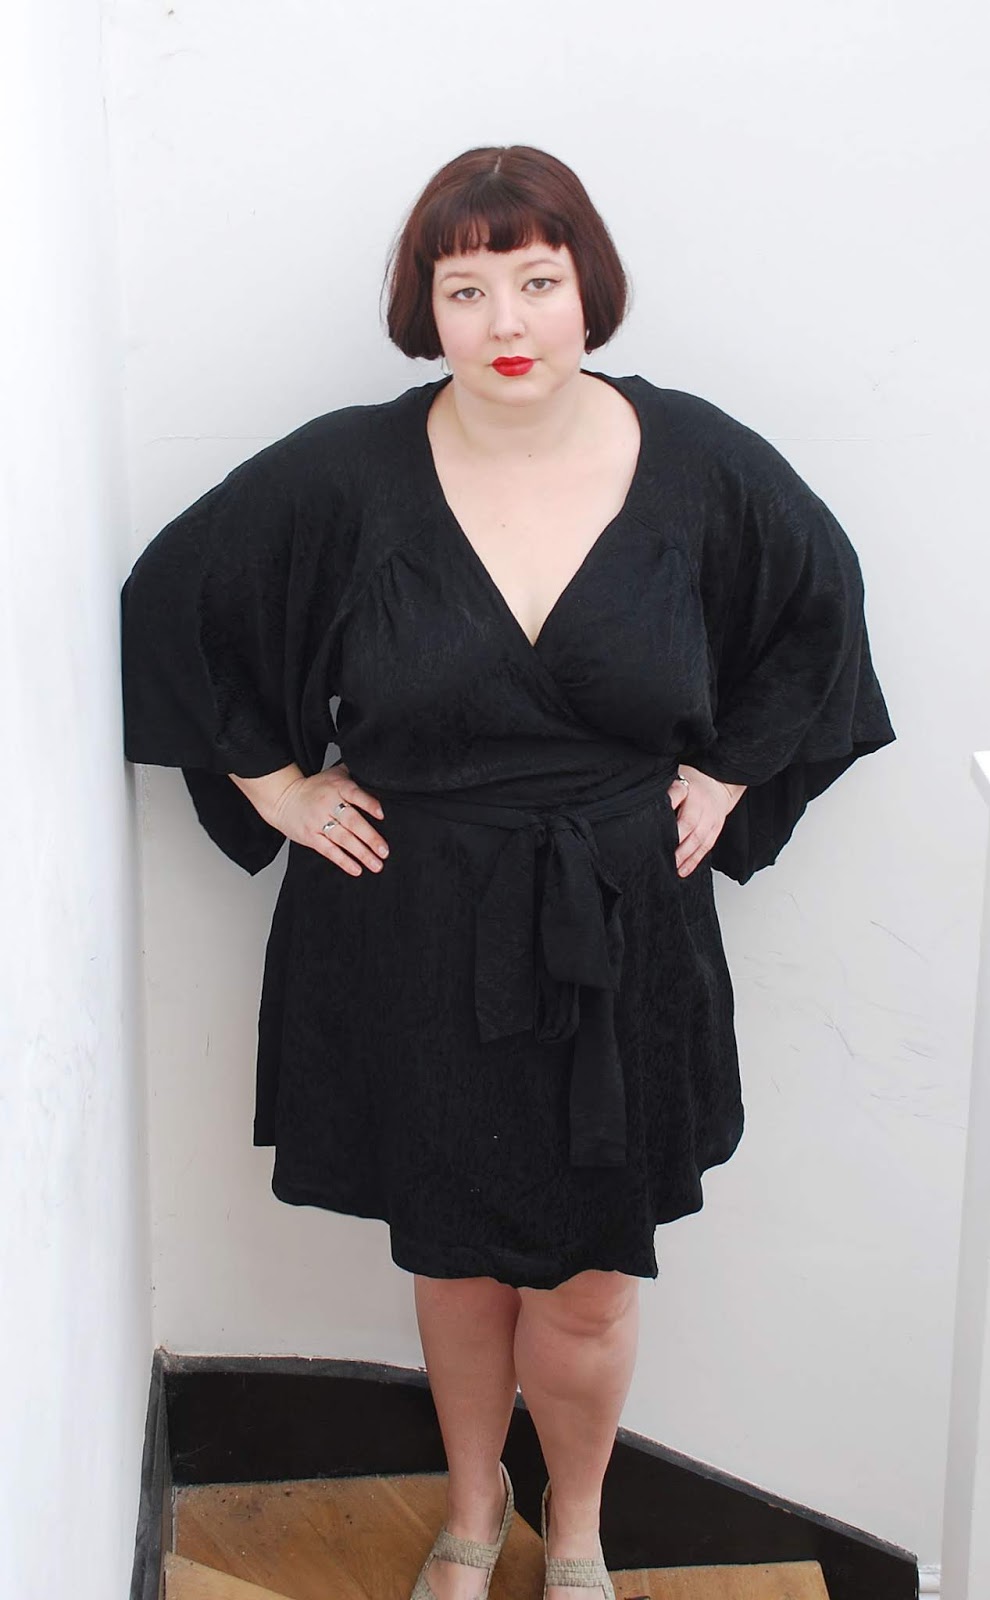
However, I eventually decided that since I owned the book I really ought to try something out. I went with the one that appealed to me most, the Ruska knot dress. I was not at all sure about it, but I always have that problem when presented with a beige sample garment.


Much to my surprise, this is great. I was fully prepared for it to look awful on me, but it actually works perfectly. The fabric is of course from Walthamstow and it could not be better for this pattern. It's on the lighter side of medium weight and has a great balance between holding shape and draping.


The main reason I thought I might hate this is that it's almost impossible to tell from the finished photos what kind of fit they're going for. It looks pretty straight up and down, but is it designed to have a boxier fit or is that just the model's shape? Since the pattern is also a T-shirt and tunic pattern, I thought it was more likely to be the former. But it's not! The T-shirt and tunic have separate, straighter pattern pieces, and the dress has a substantial amount of curve in the waist-hip area, even before I started drawing wild lines across three sizes.


I cut the hips a couple of inches bigger than measurements dictated because I was really worried about clinging, but I really didn't need to do that. It doesn't make much difference in this fabric, but as you'll see shortly, in a heavier fabric it's noticeably too much.


The one issue I had was the neckline. This is an issue I have with Named in general - almost all of their patterns have super-high necks (unless they're strappy, or are trousers) and I've never thought that worked for me. The book only has one variation of one pattern where the neckline isn't right up at the throat. I decided to give this one a try anyway, balked a little when I sewed the ends of the neckband together and realised I'd have to stretch the fabric to almost its full capacity to get it over my head, then decided to leave the neckband until I was able to try on the dress. The neckline as drafted did not suit me at all and I made a few attempts at scooping it out before I realised the problem wasn't the depth, it was the width. Everything I've ever made from Named has a neckline that starts exactly where my neck ends, with no hint of shoulder, and in most things I make from them it's fine. But more than once now I've tried to make a T-shirt with one of their patterns and I find myself staring at this massive lumbering wall of shoulder. I don't even have wide shoulders but it looks really off proportionally. (I went back to read my Selja tee review while writing this; I still wear that T-shirt for exercise and think about how much shoulder I have every time, but I'd completely forgotten that I'd actually already attempted to alter the neckline. God knows what it looked like before!)


I couldn't tell you with any real accuracy how much I cut down the neck on this one. I didn't have another pattern's neckline immediately to hand so I just cut bits off and tried the dress back on each time. I really like how it looks now - I don't think a scoop neck would have worked here, but with a bit of extra room at the sides I don't feel like I'm entirely composed of shoulder and despair. (If Shoulder and Despair wasn't a furious emo band in the early 2000s, someone really slipped up somewhere.)


I'm really happy with this dress. It's incredibly comfortable and I think I'm going to be able to wear it pretty much anywhere. It works with or without tights, so it might be one of those rare all-year-round dresses too. It also feels oddly familiar to me - maybe I used to have a jersey dress in a similar fabric, but I have to actively remind myself that this is a new dress and not an old favourite I've been reunited with. It's a little trippy, actually.

Buoyed by the success of this version, I decided to take a risk.


I got this ABSOLUTELY AMAZING rainbow foil sweater knit on my most recent Abakhan trip. I have a "no buying fabric without a specific garment in mind" rule in effect right now and this did not meet it at all, but I bought it anyway without a second thought. When I got it home I started to worry; I couldn't imagine any way to put seams into this print, nor could I imagine any one-piece-front pattern that would look good on me. But the first Ruska worked so well that I found myself wondering whether this was finally my route to the mythical attractive-looking T-shirt dress. I talked myself into it by reasoning that I had three metres of this stuff, so I could easily use 1.5m for a trial version and if there was even a starting point of workability I could remake the whole thing no problem. If it was hideous, I could scrap the whole idea and just make some sort of jumper with the remainder. Once again I was fully prepared to hate it, and once again I was pleasantly surprised.


I'm in two minds about whether to remake this version. The extra room I added at the hips gives me noticeable fabric hip wings in this heavier fabric, and so far I've not been successful in removing them. I also think it's maybe a tiny bit too short and in need of a slightly different neckline. This fabric didn't work as a neckband, so I didn't use one, meaning it's not quite the shape I had in mind. I've worn this out quite happily already - it's an amazing low effort/high impact dress and it's super comfortable - but there is a chance that I'll cut this one down to T-shirt length and remake the dress with a few alterations.


Buoyed by success yet again, I made this:


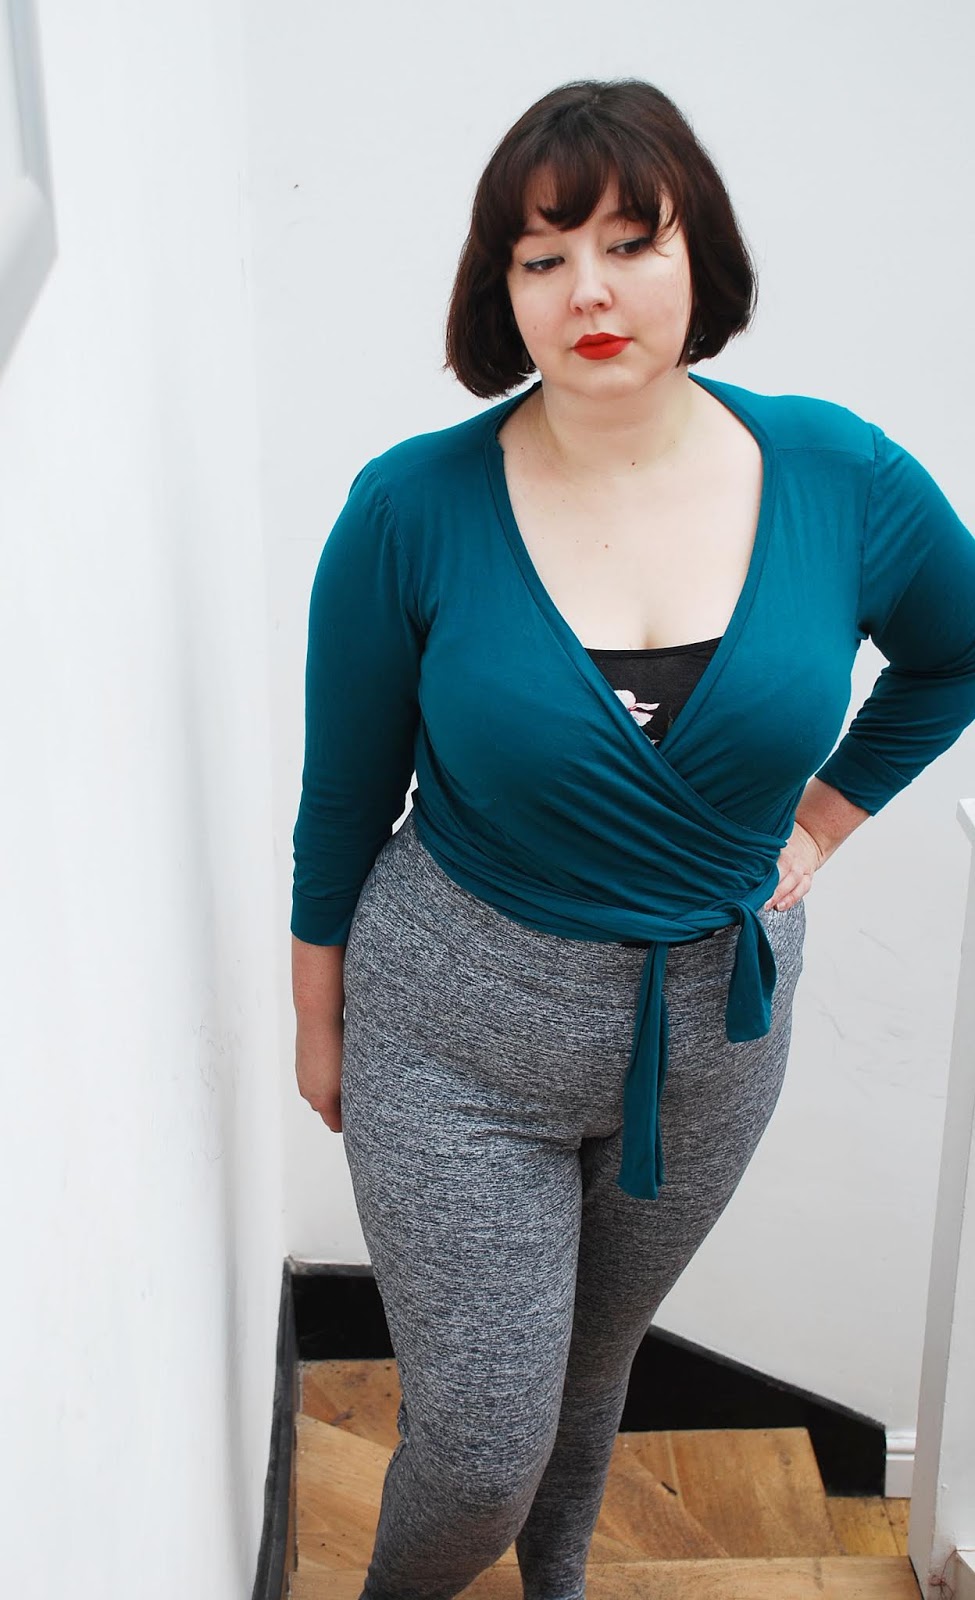
This dress was made with a very specific intent. Quite a lot of the projects I make and the way that I plan them are to work with or around my mental disorders, and I keep a fairly close eye on the way my sewing and my clothes impact my mood and state of mind. Getting properly dressed in nice clothes is something that definitely helps me, but sometimes sensory issues and mental blocks mean I end up just sitting in a pile of clothes on the floor going nopenopenope and then nothing gets done all day. One of the things that always gets in the way here is the waist seam. For some reason when I'm in this state I cannot stand them. I don't want skirts or trousers on, and I can't cope with a dress that has a waist seam even when it's fairly loose. Just the fact that it's there upsets me. I wore the SOI Heather dress a lot for the first few months after I made it for this reason, but it was also quite unflattering, which made me feel worse. So what I wanted was a pullover jumper dress with no waist seam that I could wear around the house but was pulled together enough that if I suddenly got a burst of energy I could just get up and go run errands in it.


This ponte is another Walthamstow find. It's super thick and soft and is so comforting to wear. I put it on, was pleased at how comfortable it was, then went to look in a full-length mirror and was surprised to see that I probably could have worn it to an office job without raising eyebrows on anyone.


I didn't cut the extra hip room for this one, and it fits much better (yet still doesn't cling to my stomach). I used the long sleeves, which don't come with cuffs but I added some anyway, partly to match the neckband and partly to bring the sleeves in at the wrists a little bit. This dress is possibly my favourite of the three; it fits well, it's extra snuggly, and I'm going to wear it to death if it's even slightly cold. 


I will definitely make more of these. I need to do some tweaking to the shape for different fabrics, but it's just SO EASY. The last two dresses took me less than an hour each to make, and only need 1.5m of fabric. Whether I will make much more from the book remains to be seen, and probably will depend heavily on how easy it is to change the necklines.


Ruska knit dress

Fabric: Between 1.5 and 2m each of Mid-weight jersey from Walthamstow // Rainbow foil printed on sweater knit from Abakhan // Thick ponte from Walthamstow
Cost: £4 // £12 // £4
Pattern details: Knit dress pattern with four views: simple knit dress with side vents, shorter dress with knotted overlay, hip-length tunic, T-shirt
Size: 6 at the shoulders out to an 8 at the hips (this is the book's sizing, not normal sizes, FYI, I'm not a size 6)
Alterations: Neckline widened and lowered, skirt length varied, cuffs added for long sleeves
Would make again/would recommend: Yes/Yes

Up next: My spring plans on Thursday, and then I'm not sure. My mental health has very much inserted itself between me and the sewing machine these past couple of weeks, so we'll have to see what I come up with! 

Tuesday 19 February 2019

winter sewing: Trina dress

I made my first version of the Victory Patterns Trina dress back in autumn 2016, and I glibly stated that the beach cover-up I made worked sufficiently well for me to move on to an Actual Dress. Then I completely and utterly forgot about it. But last year I suddenly got a hankering for a nice black dress I could wear to cocktail bars, and the Trina popped into my head as something that could be chic, a little different, and remain comfortable through my standard practice of stuffing my face with bar snacks until they won't let me have any more.


The fabric is the same silky viscose I used for my first Magnolia dress, but in black rather than navy. I kind of knew as soon as I bought the navy that the black would be perfect for this dress, but I held off buying more until January. Fortunately he still had some, and was still happy to give me a hefty discount in exchange for buying quite a lot of it.


(I'm now going to switch to inside photos, because the light was just horrific when I took these first few but I felt you couldn't get the full effect of the sleeves when I was standing on the stairs. Some of said inside photos were taken before I cut my hair and some were taken after, so there's slight haircut whiplash. Sorry.)


My first version was ever so slightly tight across the bust, so the only adjustment I made to the pattern was to go up one size in the bust, using the neckline from the smaller size, and that worked pretty much perfectly.


There are two issues with this pattern. One, the instructions. They've tried to make them as comprehensive as possible, which means they take six (SIX) bullet points to say "sew two lines of gather stitching on bodice front between notches and attach to front edge of sleeve". Two bullet points to explain how to gather, then separate points for aligning the pieces, pinning, actually gathering, and sewing. I'm sorry, but if you need it explained in that much detail, this pattern is too complicated for you. This is not an absolute beginner garment. If you'd given me this pattern before I'd learnt how to gather fabric I would hidden in the cupboard and cried. Attaching the bias facing piece to the neckline takes another twelve steps, and when I last made this two and a half years ago I spent ages trying to work out if I'd missed out a step because there were so many instructions. It was almost worse this time because I read the first couple of bullet points, thought "oh right, I get it", finished attaching the facing and then went back to almost an entire page of further neckline facing instructions. They tell you to understitch the facing before turning the entire thing to the inside and topstitching it down, and I cannot see why you would do that. What does that add?


The second issue (and possibly the reason I haven't seen too many people make this dress) is that it's really, really easy for it to accidentally look like a bathrobe. Especially if you're making it up as a special dress and using pretty, shiny, slinky fabrics. When I had this dress almost finished and went to check it in the mirror, I thought it was going to be unwearable. It was shiny and slinky and black and voluminous, which gave bathrobe vibes and bin bag vibes in equal measure. And since it was late, my eye makeup had melted and my hair had gone a bit wild, meaning there was also something of the furious jilted witch about me. Let's say it wasn't my best look.


I fixed this problem as I fix most problems with dresses, by lopping a good chunk of length off the skirt. This works much better proportionally, at least for me - having more leg on show balances out the huge sleeves quite nicely.


When I wrote my initial plan I hadn't thought of this as my birthday dress, but once I realised I'd be making it in late January, it seemed to make sense. I wore it out for dinner with Patrick on Friday (amazing restaurant with a "Press for Champagne" button at every table) and then for a spontaneous trip to a social dance afterwards, and it worked perfectly for both. I was a bit surprised by the latter because a) I tend to think of wrap dresses as slightly precarious for dancing in and b) I was really quite drunk by the time I got there, which ups the possibility of a wardrobe malfunction at the best of times. But the wrap was very secure, the skirt stayed down, the neckline didn't so much as budge, and nobody accidentally put their hand up my sleeve instead of on my shoulder when catching me after a spin. What more could you ask for? 


Victory Patterns Trina dress

Fabric: 4.5m silky viscose from Walthamstow market (if I'd shortened the pattern rather than the garment I would have needed a fair bit less)
Cost: I paid £15 for 5 metres, but it would normally cost £25
Pattern details: Wrap dress with kimono-style construction; front bodice overlaps the back to leave a space under the sleeves for the ties to pass through. Bust gathers at the bodice, below-the-knee flared skirt
Size: 14 at the shoulders and waist, 16 at the bust and hips
Alterations: Skirt shortened by about five inches, French seams used throughout
Would make again/would recommend: Possibly/Yes


Up next: my first (and second, and third) experiment with Named's new book Breaking the Pattern, the Ruska knot dress.

Monday 11 February 2019

actual activewear attempt: Simplicity 8424

I fully intended to make leggings last year, and then I just sort of... didn't. I was not in a great place body image-wise last year and I think I was worried about making bottoms with negative ease. However, this year I'm trying to get back into both weightlifting and dancing, and I probably can't do that with my two pairs of ancient RTW leggings.


I bought Simplicity 8424 because of the version with the leg ribbons, but realised fairly quickly that a) they would be super-annoying for actually working out in and b) shorter leggings would require lower leg hair removal, and it would be WAY too easy for me to say "oh, my legs are hairy, guess I can't go to the gym". So there was never any real question of me making any view other than the full-length version. 


I got this fabric at Abakhan in North Wales and it's AMAZING. I don't think I'd ever come across proper activewear fabric before; everything I'd seen while looking for legging fabric was either bog-standard jersey or shiny swimwear fabric, neither of which seemed like the right thing. Abakhan doesn't sell that much on their website, but when you go to the warehouse they have giant bins of all different types of fabric that they sell by the kilo. I think I have enough left of this piece to make a second pair, and I really wish I'd done a proper forage for some more. It has all the stretch and recovery you'd expect, but also it's incredibly soft. It's somewhere between leggings and jogging bottoms. It also completely coincidentally matches my sports bra exactly, so I can strut around the house being Athleisure Jen. 


The one major problem I had with these leggings is that I stupidly followed the measurement charts and they came up HUGE. I cut an L waist and XL hips and they were enormous and wrinkly and sad. I took the side seams in by about two inches per side (three from above the knee to the ankle) and cut a wedge out of the back waistband. This was not the best solution; the back rise is now way too short at the centre and I wouldn't feel comfortable wearing them without an underlayer, but that waistband was NOT coming back off. Having worn them for a proper high-energy dance class and a weightlifting session, I think they're actually still too big in the legs. I might even have to go down two sizes. 


These took me maybe an hour to make. I had all the pattern pieces but the instructions were nowhere to be found, so I have no idea if I used the recommended construction. It's just a front leg, a back leg, and front and back yokes, so I can't imagine there's really a way to do it wrong. Then I spent another hour taking everything in two or three times. Sigh. 


I will definitely make more leggings, but I haven't yet decided if it's going to be these leggings. I do like how simple and fabric-economical they are, but it's not my ideal fit. Maybe that's all down to my quick-fix resizing, and I may well have another go at these in a smaller size, but I'm also in the market for other patterns. I'm considering the Sewaholic ones, as they're designed for bigger hips and thighs. 


While I was writing this post, I decided to go back and check what I'd written about the wrap top from the same pattern when I made it last spring. Turns out I started writing a draft but never actually posted about it. Oops. 


Here it is, anyway. I made it almost a year ago and I've worn it a ton since then, but never as activewear. Long sleeves, short bodices and fastenings that could become unfastened are dealbreakers for me in workout gear. I usually wear it over short dresses or jumpsuits. It is the most fabulous colour, particularly for my skin tone, and I'll often put it on to perk an outfit up. 


I did make one substantial change to the pattern by adding binding to the whole neckline. I hadn't wanted to do that (I have three Coppelia wraps with wide neckbands and I wanted a different look for this one), but the pattern called for clear elastic and I knew I wouldn't be able to make that look good on this super lightweight jersey. I was a bit annoyed about this at the time, but I barely notice the change anymore. 

(I did also make the vest top out of the same fabric, but it looked hideous on me and I got rid of it a long time ago. I liked the idea of it because the straps were done with fabric bands so I wouldn't need to find a matching colour of fold-over elastic, but I thought it gave the finished top a slightly weird shape and I didn't like the way it looked on me at all. The vest top in these photos is the So Zo free one, which I've made a couple of times now and happily fills all my vest top needs.)

There will definitely be more of this sort of thing coming. I would like to feel as though Exercise Jen is an integral part of my life who deserves the same level of fancy-ass handmade clothing as Regular Jen, rather than an afterthought who'll wear any old shit, so more leggings, more exercise tops, and I'm planning to try making an actual sports bra in spring. I have no idea how that's going to go, so stay tuned!


Simplicity 8424

Fabric: Approx. 1.5m of activewear fabric for the leggings and 2m of viscose jersey for the top
Cost: £13 for the grey (which should give me two pairs) and £10 for the blue
Pattern details: Multiple lengths of pull-on leggings with options for a waist tie or calf/ankle ties; a layered, ruched vest top with fabric bands for the armholes; simple ballet-style wrap cardigan
Size: L waist, XL hips (after alteration probably M waist, L hips or smaller), straight size L for the top
Alterations: Neck binding on top; massive amounts of taking in on the side seams and waist of the leggings
Would make again/Would recommend: Yes/Yes for the leggings, unsure/unsure for the top

Up next: my birthday Trina dress!

Monday 4 February 2019

Papercut Sierra jumpsuit, round two

They said I was crazy, but I did it. Meet the second, somewhat better fitting, version of my Papercut Patterns Sierra jumpsuit.


Sadly, I think this one is also a fail, and it's a fail due to the fabric, which is particularly galling after everything I went through with the pattern. The dude at Walthamstow didn't have the fabric I used last time, so I got the most similar thing he had and I don't really like it. It's not as black as the previous crepe and also the static is RIDICULOUS. The shape of the trousers looks really weird in these photos because the fabric is clinging and crackling and riding up my leg. It's almost MC Hammer looking. I'm actually thinking of going back in and partially lining the trousers to see if that fixes things.


Changes! I did a 1.5 inch FBA and it's still more cleavagey than the pattern envelope suggests. That's OK, though, it's for evening and I'm quite pro-cleavage. I would probably bump it up another .5 inch were I to make this again, I think.


I altered the back to be a bit smaller and cut a bit of extra room in the hip. Turns out I did not need the extra room in the hip, I just thought I did because the pockets sucked so much. It's quite hard to see the shape of the trouser legs when I'm looking at the mirror, but now that I've seen the photos I'm definitely going to go back and take them in from hip to mid-thigh. At this size I don't need to use the zip at all, and ideally I'll alter it to a size that's a bit more fitted but still doesn't need the zip so I can just take the stupid thing out.


(For some reason the back is lower in this version, and I cannot for the life of me work out why that is.)

Instead of the stupid in-seam pockets, I used the slash pockets from the Sewaholic Thurlow trousers. I'm not sure this was the best idea, as they do feel and look a little bulky, and they definitely look quite strange with the excess hip volume, but even so it's an improvement. The best idea would have probably been to dispense with pockets entirely, but for some reason I find trousers without pockets really unnerving. I've since read a couple of other reviews which say they had the same issue with the pockets gaping despite not having giant hips like me, so it's possible that just using a different in-seam pocket piece would work.


Even now knowing what the instructions were trying to say and what the end result of each stage should look like, the construction was still annoying. The line of jumpsuit is super-confusing and I really hate that you can't do any fitting at all until the whole thing is completely finished. Because of the way the pattern is designed, I'm really not sure that there's another way around it. It would be fine if the pattern was made up of a top and a pair of trousers, but it's not. The back is one solid piece. I'm not even sure why this is - when the jumpsuit is on you can't even tell that it's one piece because there's a tie wrapped around the waist. There are no contour darts or anything that might be disrupted by making the back into two pieces, and I'm actually quite tempted to give it a try, despite having initially sworn off this pattern forever when I realised this version wasn't really wearable either.


There are multiple pieces of fabric in my stash right now that would make great versions of this, both as the jumpsuit and the playsuit. My red linen from Mood would look fabulous as this pattern. I have some bright green crepe that was almost definitely going to be a Sierra. All the pattern had to be was OK and I would have made at least seven of them, but I just don't know if I can do it again. My answer was "definitely not" until I thought about cutting the back piece in two, and now I am thinking I might try it. It seems INSANE to do this again, I know, but I really want this stupid jumpsuit now. If I do cut it in two, I might replace the back bodice with a different pattern - I think the Cashmerette Webster uses a similar kind of facing construction and doesn't do awkward bra-flashing things.


Papercut Sierra jumpsuit

Fabric: 2.5m of crepe/1m of viscose lining fabric  from Walthamstow market
Cost: £10.50 for the lot (double that if you count the previous failed version)
Pattern details: Wrap jumpsuit with wide leg/narrow leg/shorts variations, with side zip and slash pockets. Front bodice is lined, front lining and back facing require bias binding to finish
Size: M in the shoulders, L in the bust and waist, XL in the hips
Alterations: 2 inch FBA, 1 inch taken out of the centre back bodice, 1.5cm added to the hips (I work in metric and imperial completely interchangeably, I'm sorry), pockets swapped out for a different pattern
Would make again/would recommend: Undecided/No

Up next: I'm not sure! I managed to finish all my winter projects before February even started, and the logical thing would be to share my Trina dress next, but I'm considering holding off until after my birthday (which is what it's for). My plan for February is to try and use up some stash fabric and/or try out patterns I already own but haven't used yet, so we'll see what I've come up with in a week's time!