Showing posts with label victory patterns. Show all posts

Tuesday, 25 August 2020

unseasonal summer sewing: a full-length Trina robe

It's been an odd week. Parts of it felt almost normal. My parents came to visit, we made them dinner and took them for a wander round what will hopefully be our new stomping ground if all goes to plan. I braved the tube for the first time to go to Walthamstow, and I'm very pleased to report that the dude was still there (though he gave me a brief fright by having moved to the opposite side of the street), doing very well and remarkably sanguine about the whole thing. But at the same time, second lockdown is looming at some unspecified distance, my life situation is entirely up in the air, it's getting harder and harder to ignore how much this flat is falling to bits, and I had one of those therapy sessions where I go in thinking it'll be a light practical-help session and then she pokes me very slightly and I fall to bits because I'm constructed entirely out of scar tissue. All of which is to say, I didn't do my pressing last week. I finally got to it yesterday, and here's what I made.


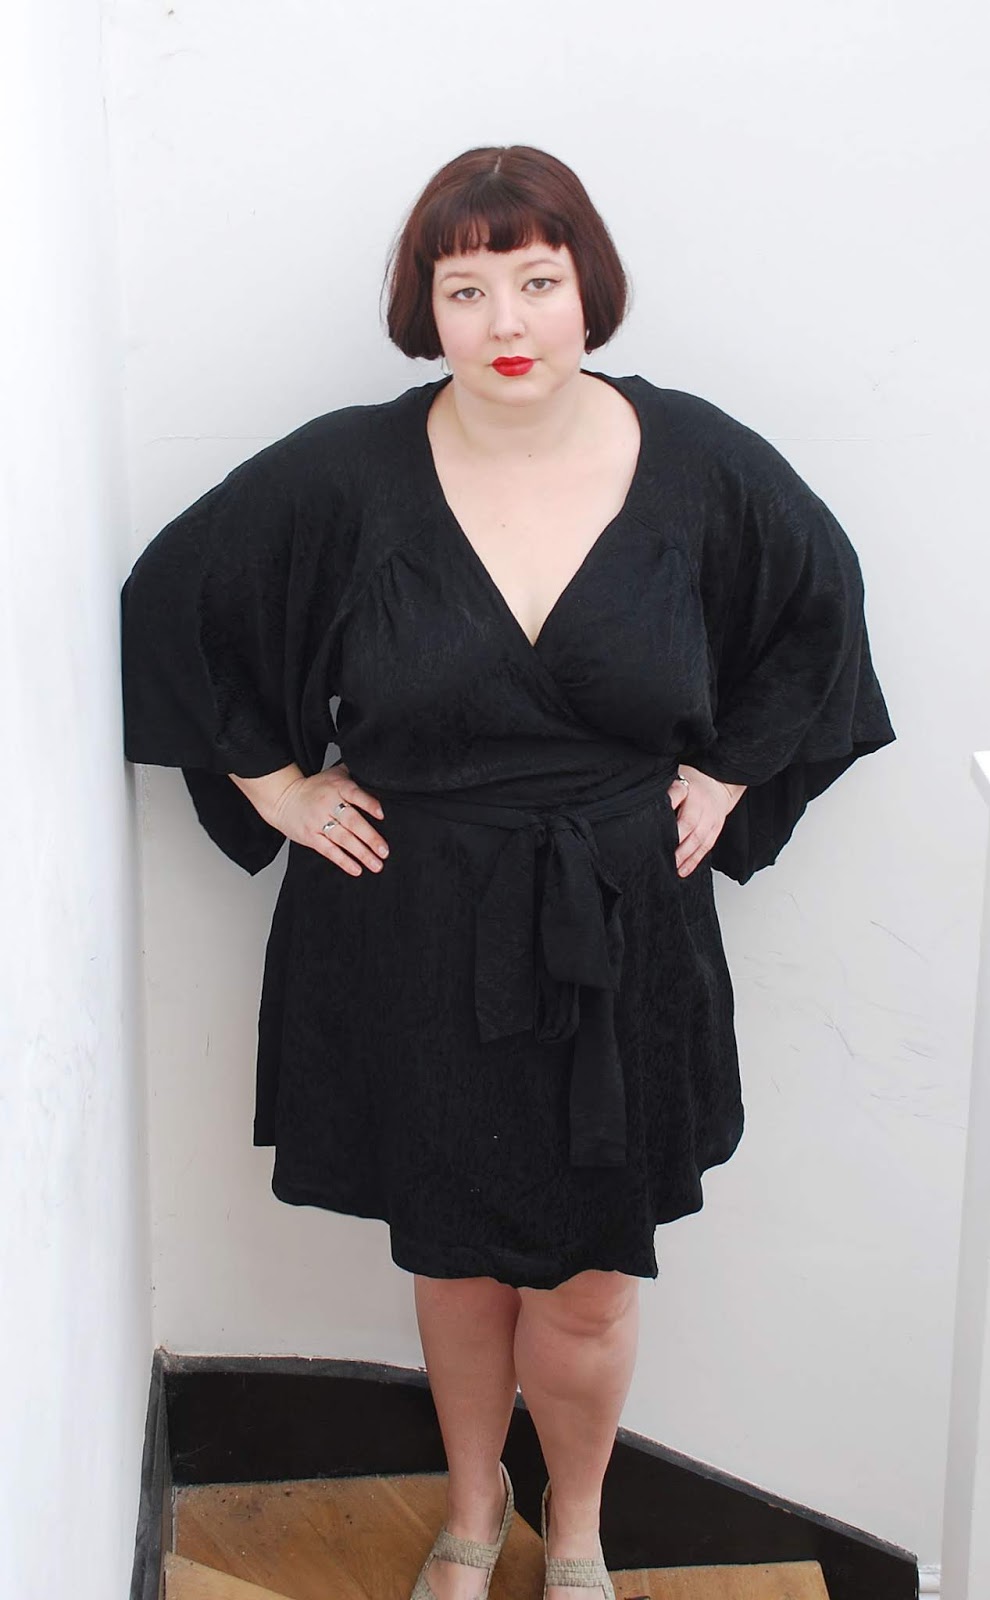
This is the Victory Patterns Trina dress, extended to full length and intended to be worn as a robe. I have a couple of robes in rotation (a fancier Named Asaka and a French terry one for when I get out of the bath) but they both have a tendency to shift and slip open which means I don't reach for either as much as I otherwise might. A more fitted one based off a dress pattern, I hoped, would up my chances of not accidentally flashing the postman.


I shared this fabric before back in April. It's from Walthamstow and according to the dude it's viscose, but it's very silky and weighty, almost like a much less annoying satin. He still had some when I went there last week and I had to sternly argue myself out of buying some more (for what? I don't even know. But it was there and my lizard brain wanted more, possibly for me to stare at and wonder what to do with for the next three years). One thing I don't think is quite coming across in these photos is how shiny it is. If I'd made this exact thing in a different fabric it would absolutely be something I'd wear as a regular dress - and I might do that at some point - but the shininess of this viscose keeps it firmly in bathrobe territory.


(I love these sleeves so much.)

My method of lengthening the pattern was a very unscientific "how much length can I add while still being able to fit all the pieces on the fabric" one, which gave me the perfect length in the back right off but the hem edges on the bias ended up needing significant trimming (as you might expect). It's properly floor-length for normal wear and hovering a bit in these photos because I'm still trying to break in my stupid extra-high sandals. The length was the only alteration I made; otherwise the size and construction was much the same as last time. Now I'm on my third version I understand the pattern enough not to be confused by the overly detailed instructions, so I enjoyed the process a lot more this go round.


I'm incredibly pleased with this robe, it's exactly what I was hoping for. It fits like a dress but has the comfort of a robe, and though I mostly intend to wear it on its own like this, I've found I can also wear it over tops without it looking too weird. It's surprisingly warm and also breathable, so it's going to be perfect for autumn. There's the tiniest amount of give in the fabric - nothing close to stretch, but just a faint bit of movement - which makes for a really great-fitting wrap. I love everything about it.


When I planned to make this I had fully expected the end result to be a straight-up Miss Fisher 20s fantasy, but in practice it is extremely 70s in a way I hadn't anticipated. Don't get me wrong, I still love it, but I was very surprised the first time I tried it on in front of the mirror. I think it's a combination of the wrap neckline and the print. I almost never go 70s, but you know what, why not try new things as you stay inside and wash your hands a lot?


Upcoming! While I've definitely been missing more days as the month goes on, having the intention to sew daily has allowed me to get enough done to be finished with my plans a week early. My intention for the final week of August is to make That View Nobody Will Make of a pattern I bought a few months ago, strictly for the comedy value. If it's decent (in the "will contain my boobs" sense rather than the "will look nice on me" sense) we can all have a collective laugh at it, though I want to post my autumn plans before we get to that. Then I'll have to decide if it's worth anybody's time to make a post featuring two Kielo dresses, one of which is plain black and the other of which is a near-exact replica of one I already had. Maybe if I surround it with sewing-related musings and make a large number of really terrible jokes?

Monday, 24 June 2019

summer sewing: emerald green Esther trousers

I made a pair of Esther trousers in April last year, and I thought I probably wouldn't make the pattern again. The shape is too distinctive to merit too many pairs, trying to get the pleats to lie flat was a huge faff, and try as I might I could not find a top to wear them with beyond the one in the blog photos. I tried a bunch of different lengths and shapes and colours and every time I looked like the doorbell had rung unexpectedly when I was chilling on the sofa in my underwear and had to scramble to put the closest things on. Pyjama realness. However, as spring progressed and I found myself severely lacking in trousers, I began to reconsider.


When I decided to make a second pair, I knew I wanted something slightly heavier in weight than last time and also a solid colour, to hopefully minimise the pyjama vibes I kept getting from my first pair. I had every intention of buying a neutral-ish colour for versatility, but it shouldn't have been any surprise to me that I came away with bright emerald green. Once again my camera refuses to accurately record any shade of green but it's much brighter than this in real life. The fabric is some form of crepe and has a little raised cross-hatch texture all over it. It's really nice.


Making these trousers in a heavier fabric was an entirely different experience. I will say that this crepe is probably too heavy; you'd be fine with a lighter crepe but this was definitely a tad too thick. Last time I said I wouldn't use a heavier fabric because of the bulk and volume of fabric around the thighs; I take that back. The reason not to use a heavier fabric is that sewing on the waistband is giant bulky pain in the arse. There are certain points on the waistline where you have the seam for the two front pieces, two large overlapping pleats, the pocket bag, and both sides of the waistband meeting in one place, and when you're trying to secure the waistband you're sewing through almost a dozen layers of fabric. I had every intention of French seaming it, too, which would have made everything worse.


On the plus side, I didn't have any of the same issues with the pleats here. I now think the fabric I used last time was too light, and it actually does need a bit of weight in order to naturally drape and fall nicely. You can see that this fabric is doing exactly what it's supposed to and there's nothing remotely prolapsed about it. Which is good, because it wasn't the easiest to press and it'll take a few more rounds with the iron before the seams lie exactly the way they should. I probably won't go back in for the pleats, though, I think they look fine.


Another thing to note that I don't think I mentioned last time is that the pockets are ENORMOUS. Almost my entire forearm can fit in there. I don't tend to carry a ton of stuff in my pockets but I really appreciate that they're there. Though I did once freak out on the Tube last week because I thought I'd lost my phone, having only reached in as far as I assumed a pocket would go instead of to the actual bottom of the pocket. Your stuff will be safe, is what I'm saying, and I don't think I really felt the benefit of them in the last pair because the fabric was so light and not really able to support the weight of much stuff.


The pattern comes with an optional sash, which I decided I did want to make this time. I prefer the look of these with the sash but want the option to wear them without, which leads to a small drawback: the sash doesn't attach to the trousers in any way, and the style of both really doesn't lend itself to belt loops. It's not a huge deal, and wearing the sash loosely double-knotted like this seems to keep it from falling off, but it does add a layer of minor annoyance to going to the loo. Especially in public. I have now found myself awkwardly wearing the sash around my neck in pub toilets multiple times.


Please excuse my face here, it turns out I only took one solitary no-sash picture. I'm not sure why that was. 

Despite the bright green, these will definitely be much more versatile and wearable than my first pair. I've tried them on with a few different things and they do not look like pyjamas with any of them. It does have to be said that the emerald green limits my colour pairings somewhat, so I'm thinking of making a couple of tops to go with them and also be useful elsewhere; depending on availability of appropriate fabric I'm planning for grey, blush and possibly some shade of blue or yellow if I can find the right one. I LOVE yellow and green but I'm not sure I love yellow tops with green trousers, so we'll see.


 (The weather is ridiculous and all over the place and unsummer-like at the moment, so the white balance of these photos is all over the place and I was occasionally forced to turn into a cat when the sun came out. I decided not to include all the grumpy windswept ones.)

Overall I'm much more positive about this pattern than I was last time, and I think I probably would make another pair if I could find the right weight and colour of fabric. I've got a much better understanding of what works and what I'd be looking for now, so finding the colour would probably be a much bigger pain than finding the weight. I don't want bright and I don't want true neutral, which basically takes it right out of my wheelhouse. What colour would you make these trousers in?


Next up: leggings! It's head-to-toe galaxy time!

Victory Patterns Esther trousers

Fabric: Emerald green textured crepe from Walthamstow
Cost: £9
Pattern details: Pleat-front trousers in two lengths, with waistband, back zip and button, and optional sash
Size: 16
Alterations: None to the pattern itself; substituted back button for press stud
Would make again/would recommend: Yes/Yes

Tuesday, 19 February 2019

winter sewing: Trina dress

I made my first version of the Victory Patterns Trina dress back in autumn 2016, and I glibly stated that the beach cover-up I made worked sufficiently well for me to move on to an Actual Dress. Then I completely and utterly forgot about it. But last year I suddenly got a hankering for a nice black dress I could wear to cocktail bars, and the Trina popped into my head as something that could be chic, a little different, and remain comfortable through my standard practice of stuffing my face with bar snacks until they won't let me have any more.


The fabric is the same silky viscose I used for my first Magnolia dress, but in black rather than navy. I kind of knew as soon as I bought the navy that the black would be perfect for this dress, but I held off buying more until January. Fortunately he still had some, and was still happy to give me a hefty discount in exchange for buying quite a lot of it.


(I'm now going to switch to inside photos, because the light was just horrific when I took these first few but I felt you couldn't get the full effect of the sleeves when I was standing on the stairs. Some of said inside photos were taken before I cut my hair and some were taken after, so there's slight haircut whiplash. Sorry.)


My first version was ever so slightly tight across the bust, so the only adjustment I made to the pattern was to go up one size in the bust, using the neckline from the smaller size, and that worked pretty much perfectly.


There are two issues with this pattern. One, the instructions. They've tried to make them as comprehensive as possible, which means they take six (SIX) bullet points to say "sew two lines of gather stitching on bodice front between notches and attach to front edge of sleeve". Two bullet points to explain how to gather, then separate points for aligning the pieces, pinning, actually gathering, and sewing. I'm sorry, but if you need it explained in that much detail, this pattern is too complicated for you. This is not an absolute beginner garment. If you'd given me this pattern before I'd learnt how to gather fabric I would hidden in the cupboard and cried. Attaching the bias facing piece to the neckline takes another twelve steps, and when I last made this two and a half years ago I spent ages trying to work out if I'd missed out a step because there were so many instructions. It was almost worse this time because I read the first couple of bullet points, thought "oh right, I get it", finished attaching the facing and then went back to almost an entire page of further neckline facing instructions. They tell you to understitch the facing before turning the entire thing to the inside and topstitching it down, and I cannot see why you would do that. What does that add?


The second issue (and possibly the reason I haven't seen too many people make this dress) is that it's really, really easy for it to accidentally look like a bathrobe. Especially if you're making it up as a special dress and using pretty, shiny, slinky fabrics. When I had this dress almost finished and went to check it in the mirror, I thought it was going to be unwearable. It was shiny and slinky and black and voluminous, which gave bathrobe vibes and bin bag vibes in equal measure. And since it was late, my eye makeup had melted and my hair had gone a bit wild, meaning there was also something of the furious jilted witch about me. Let's say it wasn't my best look.


I fixed this problem as I fix most problems with dresses, by lopping a good chunk of length off the skirt. This works much better proportionally, at least for me - having more leg on show balances out the huge sleeves quite nicely.


When I wrote my initial plan I hadn't thought of this as my birthday dress, but once I realised I'd be making it in late January, it seemed to make sense. I wore it out for dinner with Patrick on Friday (amazing restaurant with a "Press for Champagne" button at every table) and then for a spontaneous trip to a social dance afterwards, and it worked perfectly for both. I was a bit surprised by the latter because a) I tend to think of wrap dresses as slightly precarious for dancing in and b) I was really quite drunk by the time I got there, which ups the possibility of a wardrobe malfunction at the best of times. But the wrap was very secure, the skirt stayed down, the neckline didn't so much as budge, and nobody accidentally put their hand up my sleeve instead of on my shoulder when catching me after a spin. What more could you ask for? 


Victory Patterns Trina dress

Fabric: 4.5m silky viscose from Walthamstow market (if I'd shortened the pattern rather than the garment I would have needed a fair bit less)
Cost: I paid £15 for 5 metres, but it would normally cost £25
Pattern details: Wrap dress with kimono-style construction; front bodice overlaps the back to leave a space under the sleeves for the ties to pass through. Bust gathers at the bodice, below-the-knee flared skirt
Size: 14 at the shoulders and waist, 16 at the bust and hips
Alterations: Skirt shortened by about five inches, French seams used throughout
Would make again/would recommend: Possibly/Yes


Up next: my first (and second, and third) experiment with Named's new book Breaking the Pattern, the Ruska knot dress.

Monday, 30 April 2018

Esther? I hardly know 'er

(Oh yes, we have progressed into Dad Joke titles, lovely readers.)

I wasn't sure I was even going to post about these.


Having been not the remotest bit interested in wearing trousers for the past few years, I've suddenly found myself wanting to wear them all the time and getting increasingly annoyed that I don't have any. Trouser fitting is still a scary thing for me, because I've made so few. I don't really understand all the ins and outs of adjusting for certain issues so it's still a matter of luck whether my trousers fit or they do that thing (everyone has a different that thing, but mine is either a gaping waistband that sinks dangerously low when I sit down, or fabric settling in below my belly making me look like I'm wearing a nappy. Or just trousers that won't go over my thighs).

I will start to get a grip on this fitting thing. But first, some actual wearable trousers. I thought the Victory Patterns Esther looked like just the thing - loose and comfortable, but interesting and cool at the same time.


The pattern is very well drafted, as you might expect, and came together quite easily. The trouser front is made up of two pieces per leg, which are pleated and overlapped at the waist making a kind of triangle shape at the thigh (it's really hard to see in this dark fabric, sorry). This is the reason I thought I didn't like these trousers. If those pleats aren't knife-sharp and lying as flat as they possibly can, they're not pretty. In a super-light fabric like this, the inside of the pleats can fall out and form what my boyfriend referred to as "pubic flaps". Don't have extra pubic flaps.

This fabric is from Walthamstow, and unless all my toiles go drastically wrong you'll be seeing a lot more of it. Sometimes I buy ten metres of something just because I can.


My intention was to install a press stud for the fastening rather than a button as directed or a sew-on stud as I would normally do, but after my first practice go (I got everything installed properly but then the whole thing just ripped straight out of the fabric as soon as I tried to use it) I gave up and went back to the sew-on method. I really dislike hand-sewn fastenings, but clearly I have not found my way around that yet.


Having got the pleats sitting properly, I really like the silhouette that these trousers give. They sit at the natural waist, there's enough room for my hips without sizing up, and because the pleats fall straight down they don't give me that pot-bellied silhouette from the side. I wasn't sure about the shape of the legs at first (I was expecting them to be a bit wider at the bottom), but it's definitely grown on me. 


I'm in two minds as to whether or not to make another pair of these. I definitely want more lightweight spring/summer trousers, but this is quite a specific shape and I don't know if I want to faff about with all the pleat pressing for a second time. I'm considering trying to mash this pattern up with the Megan Nielsen Flint trousers - I love the shape of those but I can't see the ties holding up in the kind of lightweight fabric I would want to use. I don't think I'd ever use the Esther for colder weather trousers - wool is one of the recommended fabrics, but it seems like an awful lot of bulk and volume for winter weight fabric. Maybe that's just me and my preferences, though. 

All in all, I'm quite pleased with these and glad I managed to rescue them from the brink of failure. Yay!


Next up: finally getting on with spring and some workout gear! 

Thursday, 6 October 2016

holiday sewing: Trina

I'll start off with the obvious: yes, this is a totally ridiculous item of clothing.


This is the Trina dress, new from Victory Patterns, which I saw quite by accident and was immediately transported into a Miss Fisher fantasy where I could finally get the 1920s aesthetic without obliterating my waist.


The pattern is a wrap dress-kimono hybrid. The sleeves are drafted in the style of a traditional kimono so that the underarm seam doesn't join up to the bodice, and the front and back bodices overlap to create a space for the ties to pass through. I really like this as a detail; I'm not sold on the whole leave-a-hole-in-the-side-seam method of wrapping a wrap dress and it's really nice to find a different way of doing it.


The pattern is seriously fabric-hungry and takes 4.5m of wider width fabric. That was a lot to gamble on a new pattern from a company I'd never used, so I went to Walthamstow Market and bought a load of this ridiculous viscose for £9. £9 seemed like a reasonable price to pay to try this out, and assuming it wasn't completely terrible I could use the resulting garment as a beach cover-up for our holiday next month. I had only scraps of fabric left over, so I definitely can't get away with buying half a metre less in future like I usually do. Hmph.


I don't think I've made any changes to the pattern except to French seam the whole thing. I say "I don't think" because I found the instructions to be occasionally overly verbose in a way I found quite confusing. There were a couple of points where I couldn't tell if they were just using a lot of words to say a simple thing or if I'd actually missed out a step. If it turns out it was the latter, then I have taken the reasoned executive decision to leave those steps out because I'm smart. I didn't make any bust adjustments, largely because it didn't occur to me until the first time I tried the bodice on for fit, but I think this is okay, especially for a beach cover-up thing. I will need to reconsider that if I decide to make a proper dress from this pattern.


Looking at this photo now I realise I should have paid attention to the print on the back skirt and matched it up at the seam, and I'm not entirely sure why I didn't. That's going to bug me. Oh well. 


This is in no way a practical addition to my wardrobe. But the thing is, I'm actually very good at making practical things. My wardrobe doesn't have any occasionless, frivolous clothes besides possibly my red Anna dress, and that was made for a specific event. While the point of learning how to sew was to have a wardrobe that would better serve me on a day to day basis, that shouldn't mean I don't get to have any fun. Besides, this will get worn. I will wear it a lot on holiday, and it seems to have become my first piece of Nice Loungewear (you remember that category of things I kept saying I needed and then never actually made any of? That). It's easy to throw on, and though I know I'm not leaving the house in it, it makes me feel more pulled together. I change the way I'm standing when I'm wearing it and it makes me feel like someone who can do shit. When you're fighting depression, that's no small thing.


From this I learned that a) I need to make more fancy loungewear, and b) that Attempt One was successful enough to move onto Attempt Two: Phryne Version. I have absolutely no idea what that will look like or how I'll afford it, but it is happening.