Showing posts with label papercut patterns. Show all posts

Monday, 4 February 2019

Papercut Sierra jumpsuit, round two

They said I was crazy, but I did it. Meet the second, somewhat better fitting, version of my Papercut Patterns Sierra jumpsuit.


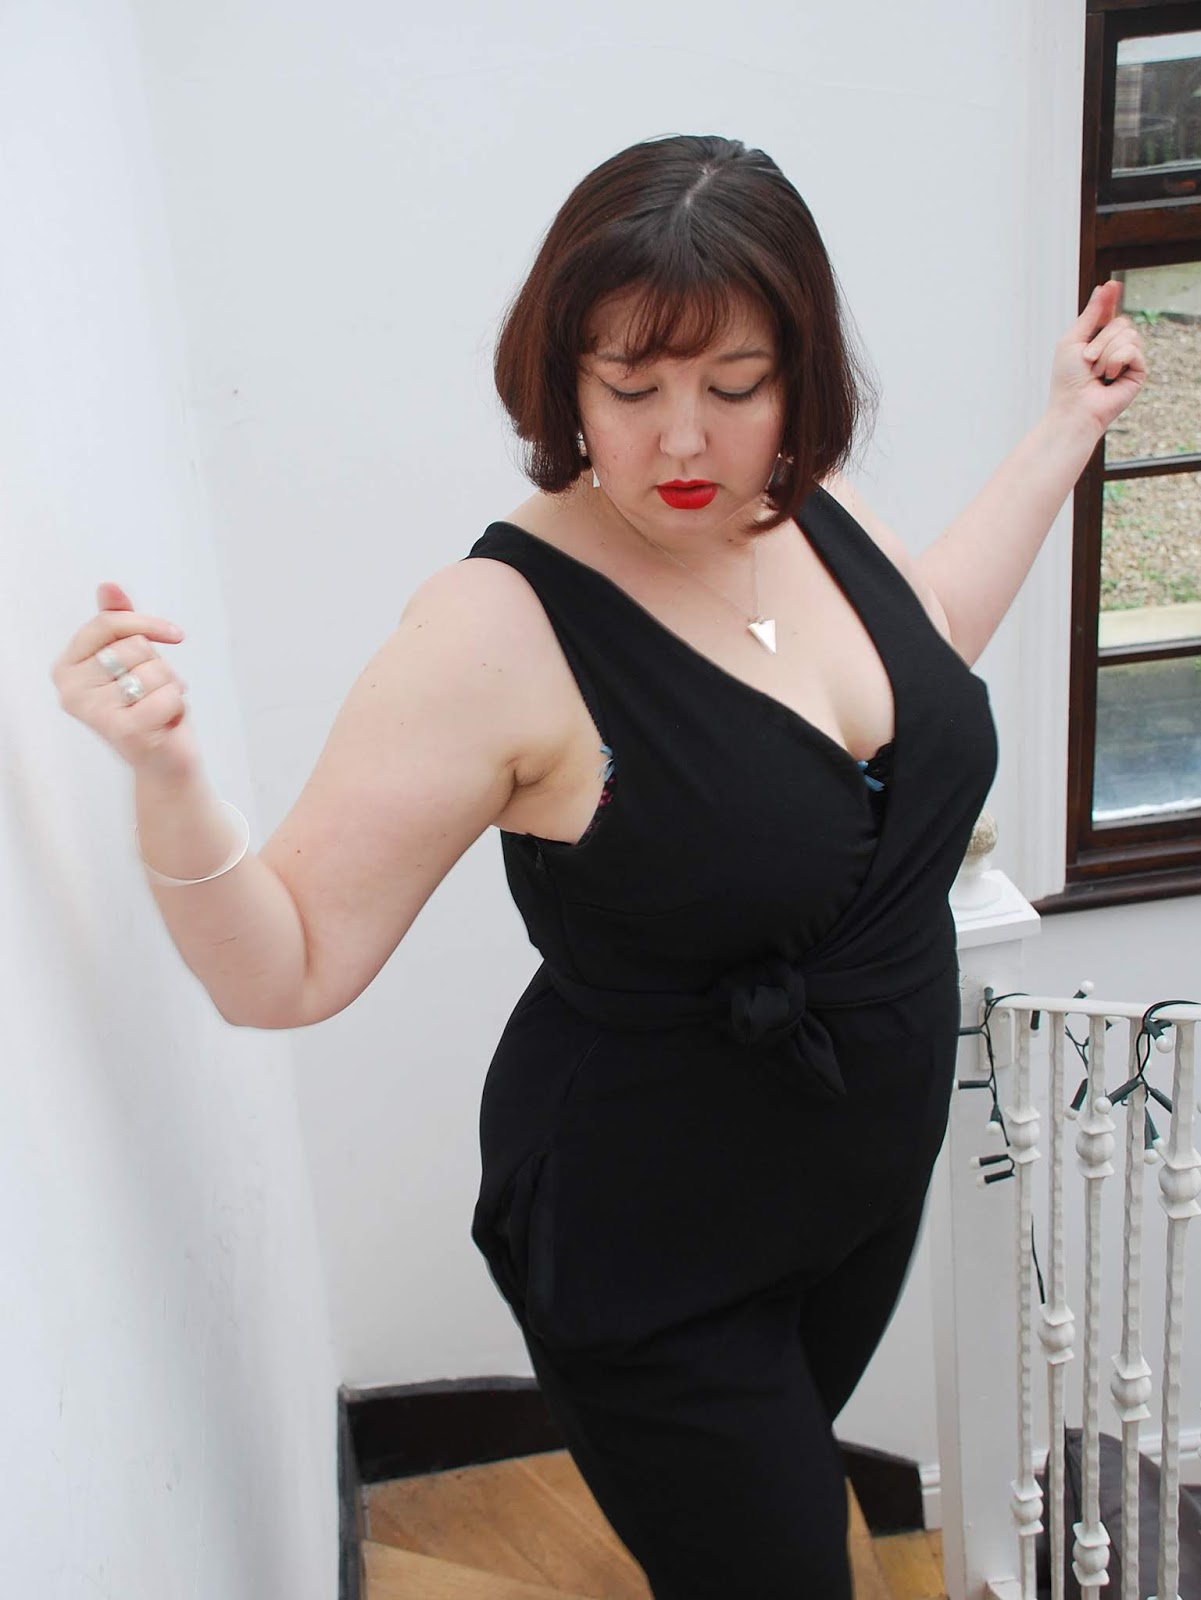
Sadly, I think this one is also a fail, and it's a fail due to the fabric, which is particularly galling after everything I went through with the pattern. The dude at Walthamstow didn't have the fabric I used last time, so I got the most similar thing he had and I don't really like it. It's not as black as the previous crepe and also the static is RIDICULOUS. The shape of the trousers looks really weird in these photos because the fabric is clinging and crackling and riding up my leg. It's almost MC Hammer looking. I'm actually thinking of going back in and partially lining the trousers to see if that fixes things.


Changes! I did a 1.5 inch FBA and it's still more cleavagey than the pattern envelope suggests. That's OK, though, it's for evening and I'm quite pro-cleavage. I would probably bump it up another .5 inch were I to make this again, I think.


I altered the back to be a bit smaller and cut a bit of extra room in the hip. Turns out I did not need the extra room in the hip, I just thought I did because the pockets sucked so much. It's quite hard to see the shape of the trouser legs when I'm looking at the mirror, but now that I've seen the photos I'm definitely going to go back and take them in from hip to mid-thigh. At this size I don't need to use the zip at all, and ideally I'll alter it to a size that's a bit more fitted but still doesn't need the zip so I can just take the stupid thing out.


(For some reason the back is lower in this version, and I cannot for the life of me work out why that is.)

Instead of the stupid in-seam pockets, I used the slash pockets from the Sewaholic Thurlow trousers. I'm not sure this was the best idea, as they do feel and look a little bulky, and they definitely look quite strange with the excess hip volume, but even so it's an improvement. The best idea would have probably been to dispense with pockets entirely, but for some reason I find trousers without pockets really unnerving. I've since read a couple of other reviews which say they had the same issue with the pockets gaping despite not having giant hips like me, so it's possible that just using a different in-seam pocket piece would work.


Even now knowing what the instructions were trying to say and what the end result of each stage should look like, the construction was still annoying. The line of jumpsuit is super-confusing and I really hate that you can't do any fitting at all until the whole thing is completely finished. Because of the way the pattern is designed, I'm really not sure that there's another way around it. It would be fine if the pattern was made up of a top and a pair of trousers, but it's not. The back is one solid piece. I'm not even sure why this is - when the jumpsuit is on you can't even tell that it's one piece because there's a tie wrapped around the waist. There are no contour darts or anything that might be disrupted by making the back into two pieces, and I'm actually quite tempted to give it a try, despite having initially sworn off this pattern forever when I realised this version wasn't really wearable either.


There are multiple pieces of fabric in my stash right now that would make great versions of this, both as the jumpsuit and the playsuit. My red linen from Mood would look fabulous as this pattern. I have some bright green crepe that was almost definitely going to be a Sierra. All the pattern had to be was OK and I would have made at least seven of them, but I just don't know if I can do it again. My answer was "definitely not" until I thought about cutting the back piece in two, and now I am thinking I might try it. It seems INSANE to do this again, I know, but I really want this stupid jumpsuit now. If I do cut it in two, I might replace the back bodice with a different pattern - I think the Cashmerette Webster uses a similar kind of facing construction and doesn't do awkward bra-flashing things.


Papercut Sierra jumpsuit

Fabric: 2.5m of crepe/1m of viscose lining fabric  from Walthamstow market
Cost: £10.50 for the lot (double that if you count the previous failed version)
Pattern details: Wrap jumpsuit with wide leg/narrow leg/shorts variations, with side zip and slash pockets. Front bodice is lined, front lining and back facing require bias binding to finish
Size: M in the shoulders, L in the bust and waist, XL in the hips
Alterations: 2 inch FBA, 1 inch taken out of the centre back bodice, 1.5cm added to the hips (I work in metric and imperial completely interchangeably, I'm sorry), pockets swapped out for a different pattern
Would make again/would recommend: Undecided/No

Up next: I'm not sure! I managed to finish all my winter projects before February even started, and the logical thing would be to share my Trina dress next, but I'm considering holding off until after my birthday (which is what it's for). My plan for February is to try and use up some stash fabric and/or try out patterns I already own but haven't used yet, so we'll see what I've come up with in a week's time!

Wednesday, 16 January 2019

winter sewing: Sierra jumpsuit

I'm a couple of days behind on my posting schedule because this jumpsuit took me way longer than I expected, and was also incredibly frustrating. This post probably reeks of UTTER FURY but that's mostly because I'm writing it immediately and have no time to just go away and get a grip. 


I've been trying to find a pattern for a black eveningwear jumpsuit for years, and everything I've seen is either way too casual or completely backless (why??). When Papercut Patterns released the Sierra jumpsuit I bought it pretty immediately - they've styled it very casually, but it looked a lot like my previous favourite black jumpsuit that doesn't fit anymore. I bought myself some black crepe and planned it in as my first project of 2019. 


Let's be clear here: this version is a fail. The vibe is exactly what I was after, but it just doesn't fit. The thing I was worried about - awkward tightness and lines round the stomach - wasn't an issue at all, but that still leaves the fact that the back is too big, there's not enough room in the hips, and there is literally no way for me to wear this without my bra all up in everyone's face. I've gone back and forth on whether to just remake this exact same thing and I think I will (assuming the guy at Walthamstow still has the fabric), but a lot will need to change next time. 


 I spent ages scouring the internet for help and information on this pattern, but because it's so new there was almost nothing. I do not have the answers to most of the problems I had, but I can lay out some of the issues I came across in constructing this one. Some of them are my fault, some of them not so much.

Firstly (and I'm not sure which of the two categories this fits into), the pieces don't become jumpsuit-shaped until right at the end. The side seams and leg seams are some of the last steps in the whole process, meaning that a) there's zero opportunity for fitting and b) it's REALLY confusing when you actually come to sew the side seams together. You probably aren't as thick as me, but I did not keep track of where everything was supposed to go and had to do a whole bunch of unpicking when I realised one of my shoulders was twisted. I spent quite a bit of time sitting on the floor with what I can only describe as a line of jumpsuit, trying to work out which seams needed to go together. It's... an unwieldy project, let's say.


Secondly, I needed slightly more room in the hip than I gave myself and chose a super-light lining fabric. As a result of this the pockets on both sides slide outwards every time I move, giving me an extra-weird silhouette. I basically have to keep my hands in the pockets, or keeping yanking on the side seams, to get them to stay put. I think this bit is mostly my fault, if we ignore the bit where in-seam pockets in trousers are the devil's work and I am officially never doing them again. What is not my fault, however, is the pocket instructions. 


The instructions are the third, and worst, problem I had. I've never had issue with Papercut's instructions before, even in my Kobe review where I took issue with basically everything. And everything was going fine on this jumpsuit, right up until we get to sewing the pockets. The instructions have you sew pocket pieces to the trouser front only (using fairly specific instructions to do so) and then sew the second pocket piece onto the first, leaving one open edge attached to nothing. Following this, the word "pocket" is never mentioned in the instructions again. The diagrams for the side seams show a stitching line all the way down, and the zip - which is a side zip going through the pocket - is explained with only "insert invisible zipper" and moving on. I'm normally quite happy for instructions not to explain how to insert a zip, but this seems to me like a fairly niche skill and one that at least warrants a mention of the pocket. There is a little note that an invisible zip tutorial can be found on their website, but all I could find was standard invisible zip tutorials. Maybe they plan to do one for this specific pocket contrivance, and maybe it'll be helpful to some confused soul six months down the line. That does no good to me right now, though.  


I eventually found this tutorial which enabled me to actually get the zip in, and I'm now absolutely certain that the pocket on the other side is just meant to be a standard in-seam pocket that they forgot to finish instructions for. Less hand-holding is one thing, leaving out steps in construction is another. Also it's completely inconsistent - they go into great detail about how to sew the first pocket piece to the side seam, so they can't possibly be assuming that you already know how to do this. There's a similar inconsistency issue with seam finishing instructions - they start by telling you which seams to finish and when to do so, and then they randomly leave out finishing the inside leg seams because maybe that particular one should be obvious? I don't know. 


Bad instructions aside, if this had eventually turned into a garment I could actually wear I'd probably be much more chill about it, and I do still think I'll have another go. I am super into the idea of this style of jumpsuit and if it fit me properly it would be great for dancing in. However, to keep both wrap and pockets in place I have to stand as still as possible, and Dancing Jen isn't great at that. 


(I totally planned to do a full old-school dance party post, but I went at it a bit too hard and my camera couldn't handle it, so everything was blurry and mostly useless for a pattern review post. Also everything looked much worse afterwards, as you can probably see.)

At some point I might go back and take the pockets out entirely, thus giving me a vaguely wearable jumpsuit that I could put a long-sleeved top underneath for autumn/winter daywear, but this invisible zip was an absolute bitch that took me about twelve tries to get in nicely, and the idea of redoing that AGAIN makes me want to cry, so it's just going to go in a pile for the moment until I work out what I want to do. 


For my second attempt, I will: add a bit more of an FBA, add half an inch or so to the hips, take the back down a size, either omit the stupid pockets entirely or steal some slash pockets from a different pattern, use a slightly thicker lining fabric, and probably add another half inch to the length of the legs (this version is lengthened by an inch already). I'm not particularly looking forward to doing it, but I really want this jumpsuit to exist in a form that fits me. If it goes wrong a second time, I will start throwing things.  

As making the jumpsuit took longer than I expected and I'm away from my machine visiting my partner's family this weekend, I really doubt I'm going to get anything done for a post next week. I've rejigged my project queue so that the next thing I make will be both familiar and brightly coloured, which should hopefully wash the taste out a bit and I'll be much less of a ball of fury when it comes to writing my next post. 


 SIDE-EYE.

Monday, 24 December 2018

winter sewing: Nettie bodysuit

My winter sewing plans stated, with complete confidence, that my first attempt at the Closet Case Patterns Nettie bodysuit would be plain black, for maximum utility.


However, sometimes you're in Fabric Land searching for a plain black four-way stretch that isn't also obvious swimsuit fabric and you walk past something that's matte, super-soft and super-stretchy, and you can't pass it up even if it is tiny black and white cheetah print layered over unidentified black blobs. I'm certain that I will make a plain black one at some point when the right fabric comes into my life, but this substrate is so perfect for a bodysuit that I will cheerfully make new clothes to go with it if I have to. 


This pattern is mostly super-simple. I chose not to put the shelf bra in because a) I wasn't making the low back version and b) there is zero chance that a shelf bra would do anything at all to support 34G boobs, so it mostly makes up like a standard T-shirt with a couple of pieces of binding round the open leg holes. If you don't put in the snap crotch this is about an hour's worth of work. But I did, because why be half-naked in a public loo if you don't have to? Also, I wanted to do the version with the high back to start off with and I wasn't sure whether that would give me enough stepping-in room.

I used scraps of black silk and hammer-in press studs. I struggle to hand-sew things securely enough and I didn't want my bodysuit randomly coming undone in public, but it did make it that much more annoying to redo everything when I realised I'd done it wrong. The instructions for this bit lost me (as instructions sometimes do) and I'd have been better off pinning and experimenting to get it right. The second time it worked... and then one of the hammer-in studs fell out. But I put it back in, and now I have a functional snap crotch! I was worried it might be uncomfortable, but I literally forget it's there.


As you can see, the legs are cut super-low. In many ways this makes absolute sense; you don't get any weird VPL, it's guaranteed to provide total bumcheek coverage with no fear of awkward wedgie situations, and given that the lower half will be covered in almost all instances it's right to prioritise comfort and practicality. But at the same time there is no denying that this is not the most flattering cut in the world. It is very much lump-emphasising. This may or may not bother you, but I thought the record should reflect.


Because this pattern is drafted with negative ease and thus super close-fitting, I used about five different sizes (ranging from a 12 in the neckline and shoulders to a 20 in the hips and upper arms) and added an FBA by just cutting some boob-shaped lumps into the front side seam at chest height. This fabric is stretchy enough that I probably didn't need to go to a 20, but I wanted to play it safe. For any future versions I'll keep the variation in sizes but choose the sizes themselves based on the fabric stretch.


I did debate making scoop front and scoop back, and I'd still quite like to try that, but I do worry that it wouldn't stay on my shoulders. I know I could add bra carriers, but I don't want to add bra carriers on something that's meant to be super-easy and casual. If I can find a suitable fabric at a cheap enough price, I think I will give it a go for science. Either way I'll definitely make another one (probably two). I will definitely not make the dress, because that level of bodycon is beyond me.


I'm wearing it with Papercut Palisade shorts. These were actually the first ones I made; I cut the trousers out first, but then decided I really needed a pair of shorts for a burlesque class I was going to that night. Not having a go-to shorts pattern, I just cut out another pair and ran them up in an hour and a half. As a result they're not the most beautifully finished, but I do like them and I do think I'll have another go. Possibly out of stretch woven if I'm going to wear them to dance classes. 


(It's super-weird to put photos of myself in a bodysuit and no bottoms on the internet, but I feel like it would be a really unhelpful post if you couldn't see the fit below the waist. So here's me leaning into it.)

It's Christmas Eve, and I'm heading out of the country today for a few days (she says confidently, PLEASE NO MORE DRONES AT GATWICK). We're having our first Christmas by ourselves this year, and we've booked a trip to France in the hope of getting some actual sunshine back into our lives. Whatever you're doing over the next few days, celebratory or not, I hope it's joyous! When I get back I'll share the completely OTT green velvet dress I'm wearing for Christmas lunch.


I thought I'd include this photo of me reacting like an Austen heroine being spotted across the room, while also wearing an animal print bodysuit on some stairs. I don't even know. 

Monday, 17 December 2018

winter sewing: Palisade trousers

Hey! So I'm still kind of sick, but this past week has been the best one for sewing that I've had in many months. I've completed four items from my autumn sewing list (well, technically five, but the M7626 trousers do NOT look good on me and I'm throwing that idea entirely out of the window), plus a bonus item. For the first time in a while I'm actually feeling encouraged and motivated, and a good bit of that is down to these trousers.


I have to say, these surprised me. I bought the pattern because I really liked the shape of the pockets and I need more slim-fit trousers for when it rains and I don't want to drag wide legs through endless puddles, but I didn't have hugely high hopes for it. Elastic waists can so often look weird on me and I never know what tops to wear with them, and since I've never made trousers from Papercut before and thus don't know how they cut them, I thought that I would most likely end up with some unflattering things that could only be worn as pyjamas, or a pair of nice-looking trousers that I couldn't put into a decent outfit for the life of me. What I got was a pair of surprisingly smart-looking trousers that also happened to have an elasticated back. I really like these.


This fabric is, I think, a cotton-viscose blend with a nice bit of weight to it. I picked it up in a swap at last month's London Stitchers' Meetup. It was already on the table when I got there so I have no idea who the original owner was, but whoever you are, thanks! It's an unusual colour for me and I'd never wear it near my face, but I really like it for trousers (even if it does get pretty wrinkly). I especially like it with this top, and it's making me want to make another.


I cut a size L for the waistband and an XL everywhere else. Rather than grading out at the hip I just cut an XL and took the excess out at the centre back, where my trousers always gape. I think this has worked but I  may need to make the back rise a tiny bit higher to compensate. It is super difficult to fit slim trousers to a pot belly, and though I know I haven't got it 100% right, but it definitely looks wrinklier in photos than it does in real life.


(It was way too cold to keep taking photos outside, so I didn't quite have enough. Stairwell shots with the heating on!)

I'm not sure how Papercut intends the trousers to fit round the thighs. I'd assumed they were meant to be fairly loose, but they certainly aren't on me and now that I look back at the product photos, they don't look enormous on the model either. I don't mind this - I fill the trousers out enough to make them look almost tailored, which is quite cool - but I do think next time I'd add a tiny bit more room for comfort. The crossover pockets look great and I like them, but they do create a bit of bulk on the inside, and with thighs like mine it is noticeable.


I will definitely be making more of these trousers, probably as soon as I'm done with Christmas things. I really like the idea of adding this silhouette to my wardrobe, and I think a black crepe pair would be incredibly useful. My yellow cord is probably too bulky for this pattern, but if I can find the right weight of fabric, a pair of mustard Palisades would not go amiss either.


Unnecessary posing in terrible light!

Up next: my Nettie bodysuit, which is totally not the plain black wardrobe staple I had intended...

Monday, 9 July 2018

SWAY! so hypnotic! SWAY! so hypnotic!

(Alright, we've gone a bit left field with the song lyric titling today. Let's see what the Venn diagram of "people interested in sewing patterns" and "teenage Goths in the late 90s" looks like.)

As I mentioned in my summer plans, my original intention was to make the Papercut Sway dress using the raspberry linen I bought on my trip to Mood last month. Being that it was a memento of a lovely holiday and as such not replaceable, I didn't want to just cut into it without checking the pattern would actually work for me, so I went out for toile fabric. I came back with some light pink floral crepe and a very confused face. Why did I buy light pink floral? Did something terrible happen to Teen Goth Jen?


It turns out that I actually don't hate it. I think the print is bold and saturated enough to take the attention away from the pink (which is a much brighter candyfloss sort of colour IRL, when the sun isn't misbehaving like this). It's another Fabric Store in Walthamstow find; lightweight with a slight crepey texture, and also a borderline confusing lack of fraying. I haven't hemmed it yet in these pictures, I've worn it out of the house unhemmed, and after more than a week there's maybe one visible loose thread. What kind of wizardry this is, I do not know.


As you might imagine, this pattern is super-easy to construct. The main body of the dress is made up of four pieces, plus an all-in-one facing, side seam pockets and a waist tie. It was a couple of hours' work at most. The bias on this one drops like WHOA, though, so it needs a fair amount of time to hang before being levelled off and hemmed. I'm actually not sure I'm going to level this off - I didn't compensate for my boobs when cutting it out, and though the shorter length at the front is fine for me, the same length at the back would be way less comfortable. I think I'll just make sure the sides are even and pretend it's an intentional high-low hem.


So, the fit. For me personally, the shoulder fit and neckline style on this dress isn't quite right. The dress is meant to be reversible, but I tried it on with the round neck at the front and it's so uncomfortable that I can't even wear it that way for a photo. I'm not sure why this is. The V neck side is fine, but also I am really not keen on the proportions. I feel like it needs to be either lower or wider or both. Not in a cleavagey way, either, just... this is too small. I think the Cashmerette Webster (which might be what my linen ends up as), for example, has a lovely size and shape of V neck without entering into the whole boob question at all. If I were ever to try making this dress again, I'd probably try and put that neckline on it.

Also, this is a bit more of a quibble, but I found the length of the waist tie slightly weird. It comfortably wraps my waist one and a half times, meaning it's too long for a normal tie and too short for a double wrap. When I wear this dress I put the waist tie in backwards, so that it wraps at the back and comes back round to tie in the front.


The combination of my exaggerated body shape and the excess of fabric means it doesn't look quite as relaxed on me as I would have liked. It's almost a circle skirt vibe, which isn't necessarily a bad thing but also isn't really what I was after. This fabric is lighter weight than my linen, and I really think it would look too bulky on me. So I'm glad I made this test version first, but also annoyed because I now have zero idea of what the linen should become. I'm considering the Webster, but worried that's too far in the other direction volume-wise. Easy unfitted summer dress pattern that works with waist ties? Help me out here? 


(It has to be said, though, that I've been very grateful for this dress during our current stupid heatwave.)

I'm not sure what's up next. I haven't sewn very much this past week; a combination of the heatwave, a fabric order not being what I expected when it turned up and an exceptionally brutal beginner weightlifting class which replaced my quads with metal rods have meant that my sewjo is sitting in the corner weeping into a motorised fan. Fingers crossed this week will be less designed to hurt me!

Monday, 25 September 2017

autumn sewing experiment: Papercut Patterns Kobe dress

Dear readers: negative review incoming. 

I admit I approached making the Kobe dress from a place of scepticism. The sample photo (beautiful romantic layering) and the line drawing (sack thing with a back detail that in no way excused the sack part) didn't seem to have much to do with each other at all. Having bought the pattern basically immediately based off the picture (shame on me, etc), I decided to see if some approximation of that photo could be achieved by using a sheer lace fabric. I'd never worked with lace before, so it seemed like a good opportunity to broaden my skill set a bit. I completely recognise that what you're about to see is not my best work, and I wouldn't normally post a hastily-sewn toile, but I do think this ought to be talked about. 


If I'd liked this enough to make a proper version, I would have cut the hem on the selvedge and made a slip to go underneath. For the toile I just left the edges unfinished and put it on over a cami and skirt. I made size L in the hips and M everywhere else, because I usually find that Papercut comes up large on me (which isn't a problem I've read about anyone else having, but I always have to take things in if I cut them according to the size chart). 

The sleeves and hem on my version are shorter than the pattern dictates. The hem is meant to hit at mid-calf so I made the pattern about eight inches shorter (a shapeless mid-calf-length dress? Get out of my office) and the sleeves were a little way above the elbow, which looked horrendous on me so I hacked about three inches off there. I also found that the neckline was wide enough to pull over my head, so I sewed the pleats together at the back rather than have to faff with a button.

So far, so uninspiring. What about the back? This is what we're going for:


And this is what we got:


(That's the zip of my skirt, not a slug trail.)

You can see here that in fact, when made in a sheer fabric, the back does resemble the beauty of the photo somewhat. It's not exactly the same, but the layers of intricate loveliness do begin to show through if you make the dress in a sheer. But here's the thing: that layered back detail is the selling point of the pattern. They KNOW that back detail is the selling point of the pattern. That's why it's the envelope picture. It is a goddamn beautiful photo that is going to make people want that dress. So why not tell people that the dress is intended to be made up in a sheer fabric? Is it cynical to say "because then they'd have to include pattern pieces for a lining or slip or something"? I don't know. I just feel like this dress is pointless without those sheer layers, and the fact that the sample garment shows the dress worn on top of another fucking dress without any real indication that that's what's happening smells a tiny bit like false advertising to me. Not to the extent that I'm going to demand my money back, but definitely enough for a side-eye and a blog post. 

I also really object to the pattern picture including a belt (and thus waist cinching) when the pattern itself includes no such thing. It's not like that would even be hard to include. I made belt loops out of two strips of selvedge and a belt out of another strip. It's some rectangles. It's easy. 

I'd also like to show you something else:


I put the dress on Patrick for our collective amusement and took a photo of the back on my phone so I could get a better look at it. This is how it naturally falls with no waist belt and no fabric underneath to disguise anything, and I don't think it looks very good. If you look back at the sample photo, the waist belt is pulling the pleats inwards, and that's part of what creates the shape. On my version, the waist belt is pulling the pleats outwards, and that's contributing to a different, but still (I think) pleasing shape. With nothing there, it just... falls straight down and hangs there, and it doesn't look anywhere near as nice as either of the belted versions. Which, again, says to me that this dress needs a goddamn belt and that should have been included, and also that it requires an incredibly specific set of circumstances to look the way it looks in the sample photo. And many of these circumstances aren't stated by the pattern at all. I'm not impressed.

Will I wear this dress? No. That back detail really is lovely in a sheer fabric, and I think mine came out really nicely (scratty sewing aside), but I don't like the rest of the dress at all. It doesn't suit me and while the waist tie helps, it's not a miracle worker. Maybe one day I'll have a go at transferring the back detail onto a better dress, but it's not a priority. Also the dress looks about eight hundred times better on Patrick, who belts it at the hips and looks like an exceptionally beardy flapper girl in it. So now it's his dress, and I'll borrow his hat and we'll do the Charleston in the kitchen. 

I feel I should say that I really like Papercut. I've made three of their other patterns and was impressed with all of them. I think their drafting is good and they've more than once produced that thing I was looking for and couldn't find anywhere else. But I don't like this. It's not a good dress for me and I am seriously side-eyeing that sample photo. I think to get from this pattern to that sample photo you have to be more talented than a medium-rated home sewing pattern should require. I've searched the Instagram hashtags and there are people who are happy with their dresses, but nobody has produced anything even remotely like the picture. This pattern should have either been way more thoughtful and complicated, or used a more representative photo. 


Feel the side-eye of Super Puffy Cold-Ridden Jen. Feel it. 

Monday, 5 June 2017

summer sewing: Papercut Yoyo dress, and also Yoyo skirt

Me Made May has left me feeling, for the first time in ages, that I really know my style. Not in the sense that I could distil it into a concept with a snappy title, but in the sense that I just know now. Inspired by this new and unfamiliar confidence, I've been itching to try new things. If I like something, it has to be worth a go, even if it ends up not suiting me.

The Papercut Patterns Yoyo dress is one I've been looking at for about a year. I bought the pattern six months ago, then sat on it because I couldn't find any examples of the dress on curvy women, and assumed that was probably because it was only designed for slim figures. Stupid assumption, I know, but there it is.


For my first attempt I bought myself some denim from Rolls and Rems in Lewisham. I hadn't been there before and it's great. Good prices, well organised, and whoever orders their fabric has a good eye for colour. I will be going back. It almost made me wish I still lived in Lewisham, but then I had to walk through the rest of Lewisham to get back to the bus stop and that cured me of my misplaced nostalgia pretty quickly.

I know everyone has made this dress in denim, but I wanted one too, dammit. (Please excuse the wrinkles, I'd been wearing it all day.)


I cut a size M in the shoulders, L in the bust and waist, and XL in the hips. I probably could have gone down a size in the waist, but as it's a summer dress I quite like that it's a bit looser there. 

The dress has bust and waist darts on the bodice, darts in the back and pleats in the front of the skirt, and one continuous facing to finish all the edges, like so:


(I finished the edge of the facing with bias binding. You will note that I ran out of the yellow about two thirds of the way round. I might be slightly more picky about my finishing these days, but I will never stray so far from my slapdash roots that I'm prepared to make a whole extra shopping trip just so the insides of a dress are uniform.)


My first attempt fit perfectly... except that it was almost indecently short in the front. I spent some time being quite grumpy, wondering who on earth this was drafted for and why anyone would recommend such a short zip. Then something prompted me to measure the zip, and that's how I discovered that John Lewis labels its open-ended metal zips by the length of the zip tape and not the length of the zip. This is a bad policy, John Lewis. I went back to the shop armed with a tape measure (much to the amusement of a couple of women in the haberdashery department) and got the right length. Having remade it, it's still pretty short, but that doesn't bother me if I'm not in danger of flashing anyone.


 I really, really like this dress. It's got a relaxed sexy vibe that I appreciate, and it fits my body shape without being tight or restrictive in any way. I'm also pretty sure I can wear it with tights when it's a bit colder so it won't be a hot-weather-only dress.


I also made the skirt version (worn with bonus black Coppelia for an accidental all-Papercut outfit):


I bought this fabric ages ago intending to make a tulip skirt, but then just sat on it because (ssshhhh) I don't really want another tulip skirt. I still love the pattern, but I have about eight of them in current rotation and that's quite enough. Based on the dress I decided to make the skirt two inches longer so it would be a bit more versatile. 

The pattern comes with a separate curved waistband for the skirt, and I fully support curved waistbands wherever I can get them. Next time I make the skirt I'll go down a size in the waist; the extra ease works for the dress but not so much for a waistband. 


(The sun went in between shots, because the weather is EXTREMELY co-operative right now.)


In conclusion, I really like and will make more of both the skirt and the dress, though I'll make any subsequent versions two inches longer than the pattern dictates.When I first bought the pattern I also bought some quite expensive fabric to go with it, and I'm now in the process of convincing myself that it's OK to cut into it. Gah.