Monday 28 January 2019

a palate cleanser, or hey look Jen made another Olivia dress what a surprise

I said I was going to make something bright and familiar next, and look at that:


I took about a year's break from making Olivia dresses, but my goal this year is to make another two or three that live up to my first one. I was so unsure about it when I made it, but it's now two years old and I still wear it constantly. Barring, say, an exercise class or a black tie gala, there's no occasion it's not appropriate for and it's also comfy enough to just wear for a day running errands or dossing around. None of my other versions have lived up to that - my three longer ones are too formal and the more recent sweater knit one is fantastic for everyday but I wouldn't go and get a swanky haircut in it.


This one is also not as versatile as the first one (though don't get me wrong, I really like it), and yet again it's the fabric that's the issue. For my ideal Olivia, I need a light but in no way transparent cotton jersey with a decent amount of stability and zero vertical stretch. This one isn't quite light enough; it's a bit bulkier than I'd like. I had the same issue with the sweater knit and the exact opposite issue with all the viscose jersey ones. This one is also extra bouncy which made the facing a huge pain in the neck (literally, I forgot to take a pin out. Ouch) and instead of hand stitching it down like I usually do, I've had to machine stitch it on whichever parts of the fabric were dark enough to hide it.


I did my standard Olivia alterations: use five different sizes across the various pattern pieces, shorten the skirt by literally half its original length, take the sleeves from full-length to just below the elbow. I've no idea why the sleeve alteration is so necessary; this is the fourth mini version I've made and every time I think "I'll keep the sleeves full-length this time, that will be warmer and less awkward" before looking at myself in the mirror and chopping the sleeves to this exact length. The full sleeves are absolutely fine on my longer versions, so it must be a proportion thing. 


I probably won't wear this quite as often as my orange one, as the fabric is too thick to transition into summer, but I will wear it a LOT. The print and the colours are fantastic and perfect for an all-purpose dress. All-purpose dress for me, anyway. I'm not very good at jeans so I'm usually slightly overdressed, and most of my sewing plans are based around trying to hit "this is just what I look like" rather than "grossly overestimated the formality of this casual breakfast". 


I'm going to experiment with putting a short summary at the end of my posts because a) I'm trying to keep track of fabric costs and b) I keep forgetting to put in information that might actually be useful. If there's another category you'd like me to include, please say so!

Named Olivia dress

Fabric: 2.5m of unidentified jersey from Fabric Land
Cost: This was a gift, but would have cost me £12.50 if I'd paid for it
Pattern details: Wrap dress with below-knee skirt and long sleeves. High wrap at the neckline, in-seam pockets which actually don't suck unless you're using viscose jersey
Size used: Five sizes, from 42 at the neckline to 50 at the bicep
Alterations: Substantially shortened skirt and sleeves (no FBA, just used a larger size at the bust)
Will make again/would recommend: Yes/Yes


Up next: Sierra jumpsuit, round two! 

Wednesday 16 January 2019

winter sewing: Sierra jumpsuit

I'm a couple of days behind on my posting schedule because this jumpsuit took me way longer than I expected, and was also incredibly frustrating. This post probably reeks of UTTER FURY but that's mostly because I'm writing it immediately and have no time to just go away and get a grip. 


I've been trying to find a pattern for a black eveningwear jumpsuit for years, and everything I've seen is either way too casual or completely backless (why??). When Papercut Patterns released the Sierra jumpsuit I bought it pretty immediately - they've styled it very casually, but it looked a lot like my previous favourite black jumpsuit that doesn't fit anymore. I bought myself some black crepe and planned it in as my first project of 2019. 


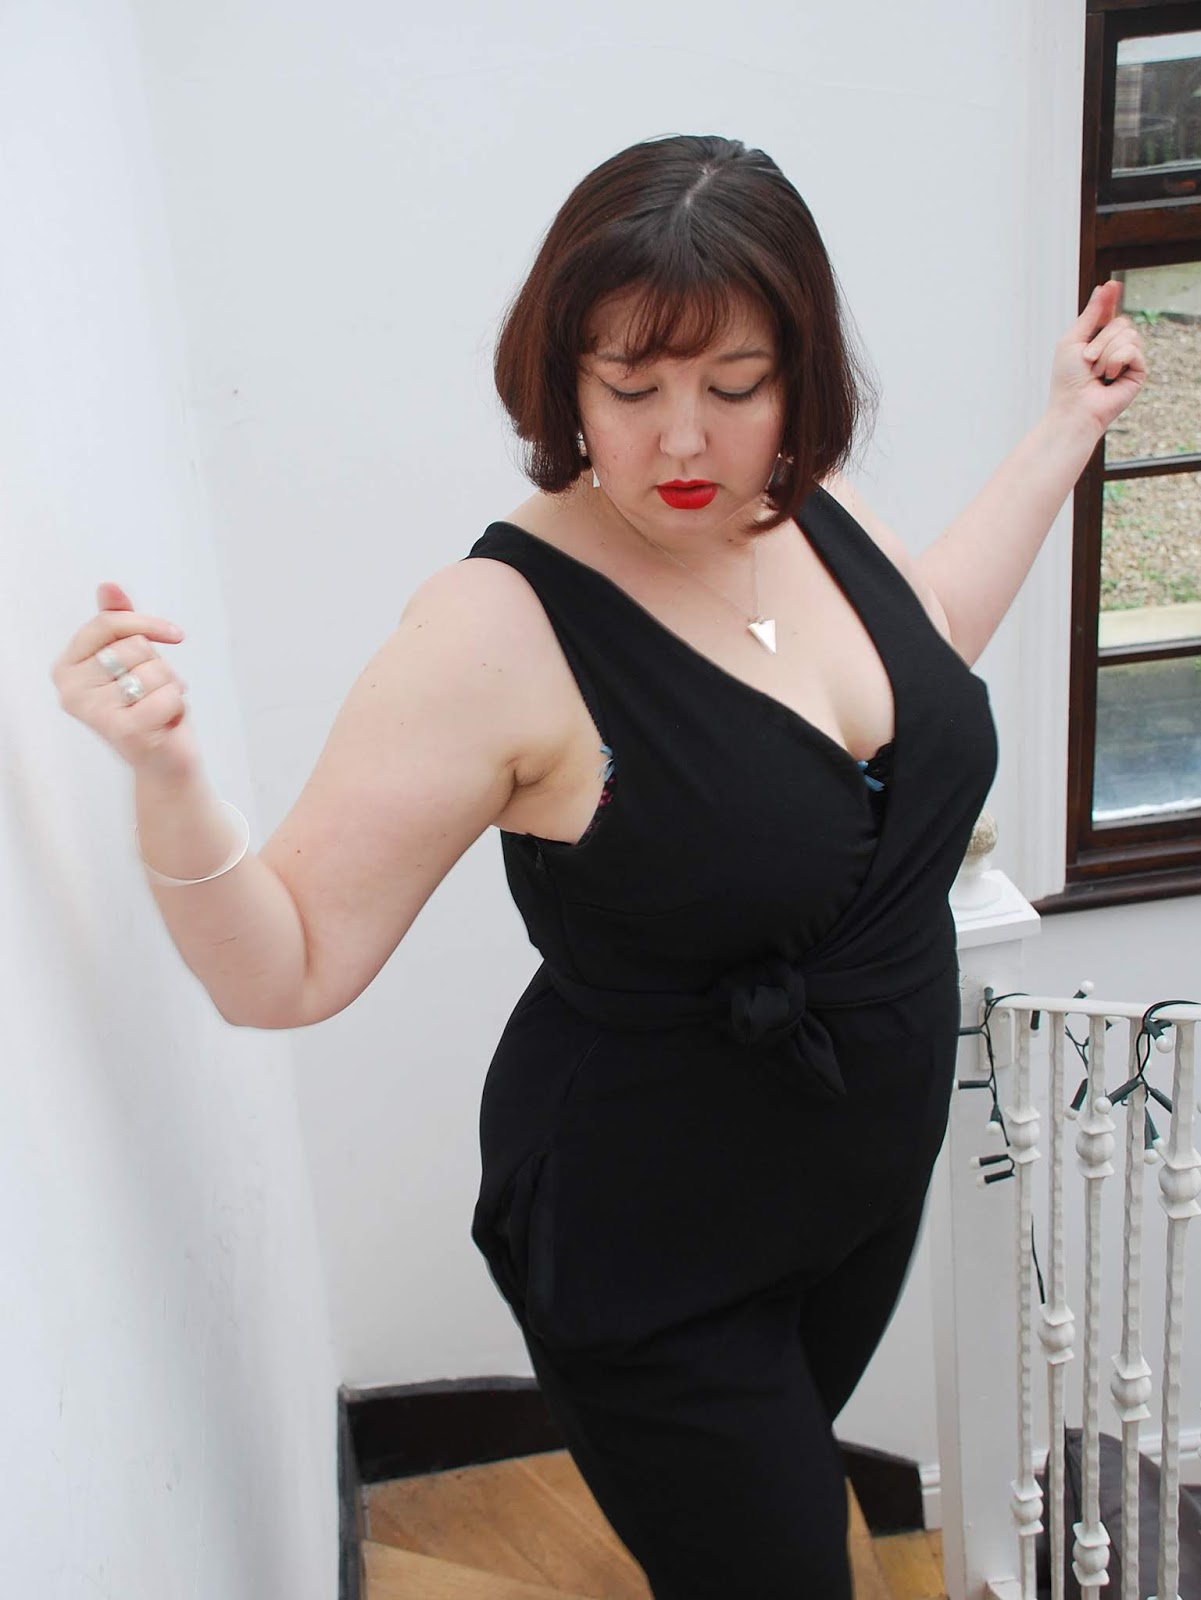
Let's be clear here: this version is a fail. The vibe is exactly what I was after, but it just doesn't fit. The thing I was worried about - awkward tightness and lines round the stomach - wasn't an issue at all, but that still leaves the fact that the back is too big, there's not enough room in the hips, and there is literally no way for me to wear this without my bra all up in everyone's face. I've gone back and forth on whether to just remake this exact same thing and I think I will (assuming the guy at Walthamstow still has the fabric), but a lot will need to change next time. 


 I spent ages scouring the internet for help and information on this pattern, but because it's so new there was almost nothing. I do not have the answers to most of the problems I had, but I can lay out some of the issues I came across in constructing this one. Some of them are my fault, some of them not so much.

Firstly (and I'm not sure which of the two categories this fits into), the pieces don't become jumpsuit-shaped until right at the end. The side seams and leg seams are some of the last steps in the whole process, meaning that a) there's zero opportunity for fitting and b) it's REALLY confusing when you actually come to sew the side seams together. You probably aren't as thick as me, but I did not keep track of where everything was supposed to go and had to do a whole bunch of unpicking when I realised one of my shoulders was twisted. I spent quite a bit of time sitting on the floor with what I can only describe as a line of jumpsuit, trying to work out which seams needed to go together. It's... an unwieldy project, let's say.


Secondly, I needed slightly more room in the hip than I gave myself and chose a super-light lining fabric. As a result of this the pockets on both sides slide outwards every time I move, giving me an extra-weird silhouette. I basically have to keep my hands in the pockets, or keeping yanking on the side seams, to get them to stay put. I think this bit is mostly my fault, if we ignore the bit where in-seam pockets in trousers are the devil's work and I am officially never doing them again. What is not my fault, however, is the pocket instructions. 


The instructions are the third, and worst, problem I had. I've never had issue with Papercut's instructions before, even in my Kobe review where I took issue with basically everything. And everything was going fine on this jumpsuit, right up until we get to sewing the pockets. The instructions have you sew pocket pieces to the trouser front only (using fairly specific instructions to do so) and then sew the second pocket piece onto the first, leaving one open edge attached to nothing. Following this, the word "pocket" is never mentioned in the instructions again. The diagrams for the side seams show a stitching line all the way down, and the zip - which is a side zip going through the pocket - is explained with only "insert invisible zipper" and moving on. I'm normally quite happy for instructions not to explain how to insert a zip, but this seems to me like a fairly niche skill and one that at least warrants a mention of the pocket. There is a little note that an invisible zip tutorial can be found on their website, but all I could find was standard invisible zip tutorials. Maybe they plan to do one for this specific pocket contrivance, and maybe it'll be helpful to some confused soul six months down the line. That does no good to me right now, though.  


I eventually found this tutorial which enabled me to actually get the zip in, and I'm now absolutely certain that the pocket on the other side is just meant to be a standard in-seam pocket that they forgot to finish instructions for. Less hand-holding is one thing, leaving out steps in construction is another. Also it's completely inconsistent - they go into great detail about how to sew the first pocket piece to the side seam, so they can't possibly be assuming that you already know how to do this. There's a similar inconsistency issue with seam finishing instructions - they start by telling you which seams to finish and when to do so, and then they randomly leave out finishing the inside leg seams because maybe that particular one should be obvious? I don't know. 


Bad instructions aside, if this had eventually turned into a garment I could actually wear I'd probably be much more chill about it, and I do still think I'll have another go. I am super into the idea of this style of jumpsuit and if it fit me properly it would be great for dancing in. However, to keep both wrap and pockets in place I have to stand as still as possible, and Dancing Jen isn't great at that. 


(I totally planned to do a full old-school dance party post, but I went at it a bit too hard and my camera couldn't handle it, so everything was blurry and mostly useless for a pattern review post. Also everything looked much worse afterwards, as you can probably see.)

At some point I might go back and take the pockets out entirely, thus giving me a vaguely wearable jumpsuit that I could put a long-sleeved top underneath for autumn/winter daywear, but this invisible zip was an absolute bitch that took me about twelve tries to get in nicely, and the idea of redoing that AGAIN makes me want to cry, so it's just going to go in a pile for the moment until I work out what I want to do. 


For my second attempt, I will: add a bit more of an FBA, add half an inch or so to the hips, take the back down a size, either omit the stupid pockets entirely or steal some slash pockets from a different pattern, use a slightly thicker lining fabric, and probably add another half inch to the length of the legs (this version is lengthened by an inch already). I'm not particularly looking forward to doing it, but I really want this jumpsuit to exist in a form that fits me. If it goes wrong a second time, I will start throwing things.  

As making the jumpsuit took longer than I expected and I'm away from my machine visiting my partner's family this weekend, I really doubt I'm going to get anything done for a post next week. I've rejigged my project queue so that the next thing I make will be both familiar and brightly coloured, which should hopefully wash the taste out a bit and I'll be much less of a ball of fury when it comes to writing my next post. 


 SIDE-EYE.

Monday 7 January 2019

winter sewing: stretch velvet Magnolia

Presenting my extremely extra Christmas dress:


I knew I wanted to try a stretch version of the Magnolia as soon as I made my first one. I loved the dress, but I loved the idea of having one without the side zip and sleeves woes even more. The idea of making it in velvet followed very shortly afterwards, and I'd seen a couple of teal and bottle-green crushed velvets at various places online that I was considering. What I ended up going with was a much more emerald colour that the guy at the market just happened to have on his stand when I was there looking for something else. I'm quite happy with the colour in person, but it just will not show up correctly in photos. Not on my proper camera, not on my phone, not on someone else's better phone, not inside, not outside, not with or without flash. It will not do it. At the bottom of the post I've included a few photos from my phone of the dress out in the wild, and please be assured it is none of the colours it appears. Argh.


I made a bunch of changes to my first version, though not so much in terms of size. I cut the back waistband a little smaller and made the back darts bigger, but that's it. My first version was very fitted and I wanted this one to give me sufficient space for a giant Christmas dinner. Also, the velvet isn't so stretchy that it requires a huge amount of sizing down, just enough to let me dispense with the side zip. I also dispensed with the back ties. I really like them as a detail, but in fabric this heavy I thought they'd just be cumbersome (especially for a dress made to sit down in). There's no excess fabric in this version so they're not really necessary.


The biggest change I made was the sleeves. Even if the original sleeves had fit me the way they're intended to, that still wouldn't have worked for this fabric. I switched out the sleeve and armscye for the Givre, which you know is my favourite, and once again I think it's worked really well. They're not noticeably restrictive but thanks to the comparative lack of stretch in this fabric they are tighter than usual. This is actually a secret bonus as it helps the neckline stay where I want it to stay.


I finished the neckline by hand as I didn't want any visible stitching there. This wasn't a great idea as it does need to stretch, but I really feel like machine stitching will warp the fit of the top across the bust, which is currently perfect. Post-holiday I went back and machine stitched the back neckline down. It's not necessarily the most elegant solution but it does hold things in place better without me having to become some sort of neckline wizard.


Remembering that version one came up short on me, I lengthened this one substantially when I cut it out. This was the wrong thing to do, because this skirt is heavy and stretchy and thus hangs down much further anyway, so I just had to go and cut it all off again. Sigh.

Here are a couple of photos of the dress out in the wild on Christmas Day:


I keep rewriting this paragraph trying to describe our hotel and I keep sounding like Margaret Drabbs the 16th most prolific Trip Advisor reviewer in Tunbridge Wells, so I'm going to stop. Suffice to say it was not as fancy as it thought it was and we were made to feel pretty uncomfortable. Also they tried to charge €26 for a Bombay Sapphire and tonic. I wouldn't pay that for a bottle of Bombay Sapphire. However, all that aside, you can't deny this is a pretty sweet view. This photo was taken just before Christmas lunch, where most other people were indeed wearing sensible beige trousers but also up to their eyeballs in foie gras so didn't really care what I was wearing.


This, however, prompted a lot of amazed stares, I think mostly because I was out on the sea front without a coat. From my British perspective it was about the temperature of a nice spring day and while I could have been wearing a coat it didn't bother me that I wasn't. However, all the locals were bundled up in quilted jackets and enormous scarves and they probably thought I was a crazy person. For someone in anxiety therapy it's actually quite nice to be magnitudes overdressed and know for a fact that the worst judgement people are making about you is that you're probably cold.


I also ended up wearing it to an extremely low-key NYE house party at the insistence of the host, who then wore green velvet herself and pressured another friend into doing the same. When we went out for the fireworks at midnight I insisted we take a photo, which turned into a "people standing round holding flashlights at various angles" job and also left me with a brief accidental video where one of my friends says to the other, "This is for Jen's Instagram, stop eating my shoulder!" while I continue to pose away, drunk and oblivious. 


Anyway, I really, really like this bodice and would like to try turning into a jersey dress for daywear. I don't know if the shorter skirt is the one for me, but as it's neither fitted nor full enough to give me hem anxiety I think I might give it a try. It'll definitely be quite cleavagey for a day dress, but that doesn't bother me hugely and it can easily be layered with wrap cardigans and so forth. I will probably bind the neckline on future versions as it won't be so disruptive when I'm not using velvet.


I'm hoping to get the Papercut Sierra jumpsuit done over the next week, so assuming it's not horrific that'll be my next post. The problem about making something so soon after pattern release is that about five tiny people have made it and it's impossible to know how it sits on curvier bodies. It's fine; I shall do it for science. Science!