So this is not exactly what I intended to happen:

I did intend to make McCalls 7626, which is what this is, and I did make McCalls 7626 in a teal babycord, which is not what this is. Let's just say I had some issues.

Let's start with the good stuff: I really like the shape and fit of these trousers. The neckline works with the Wanted top underneath exactly the way I pictured it. I've been thinking about an olive winter jumpsuit for a while now. It's outside of my wrap-dress-and-tulip-skirt comfort zone, but I do think the end result is cute.

BUT. I found making it to be kind of a headache. The first and most important reason is that the sizing was not what I expected. Here's attempt one:

Cute, right? I actually like this version much more. The colour is better on me and the fabric isn't as thick, which definitely works better for this pattern. The only problem is that I can't do it up and the back is just flapping open behind me in this photo. I have a small amount of fabric left over, and I would love some advice on where/how to insert extra fabric to make this fit me properly. I'm finding the whole idea a bit intimidating at the moment.
I was frustrated, but I wanted a wearable jumpsuit. So I bought this olive corduroy on my Goldhawk Road corduroy hunt, and had another go, sizing up basically everywhere except the mid-upper back, which always gapes on me anyway.


This one fits (and fits comfortably with a top worn underneath it), but it's not perfect. As you can see in the photo above, the height of the back is in exactly the wrong place for a comfortable zipping experience. It's slightly too high to do up in one motion from the bottom, but slightly too low to be able to finish by reaching over the shoulder. It's really annoying. Also the legs could do with a little more length.
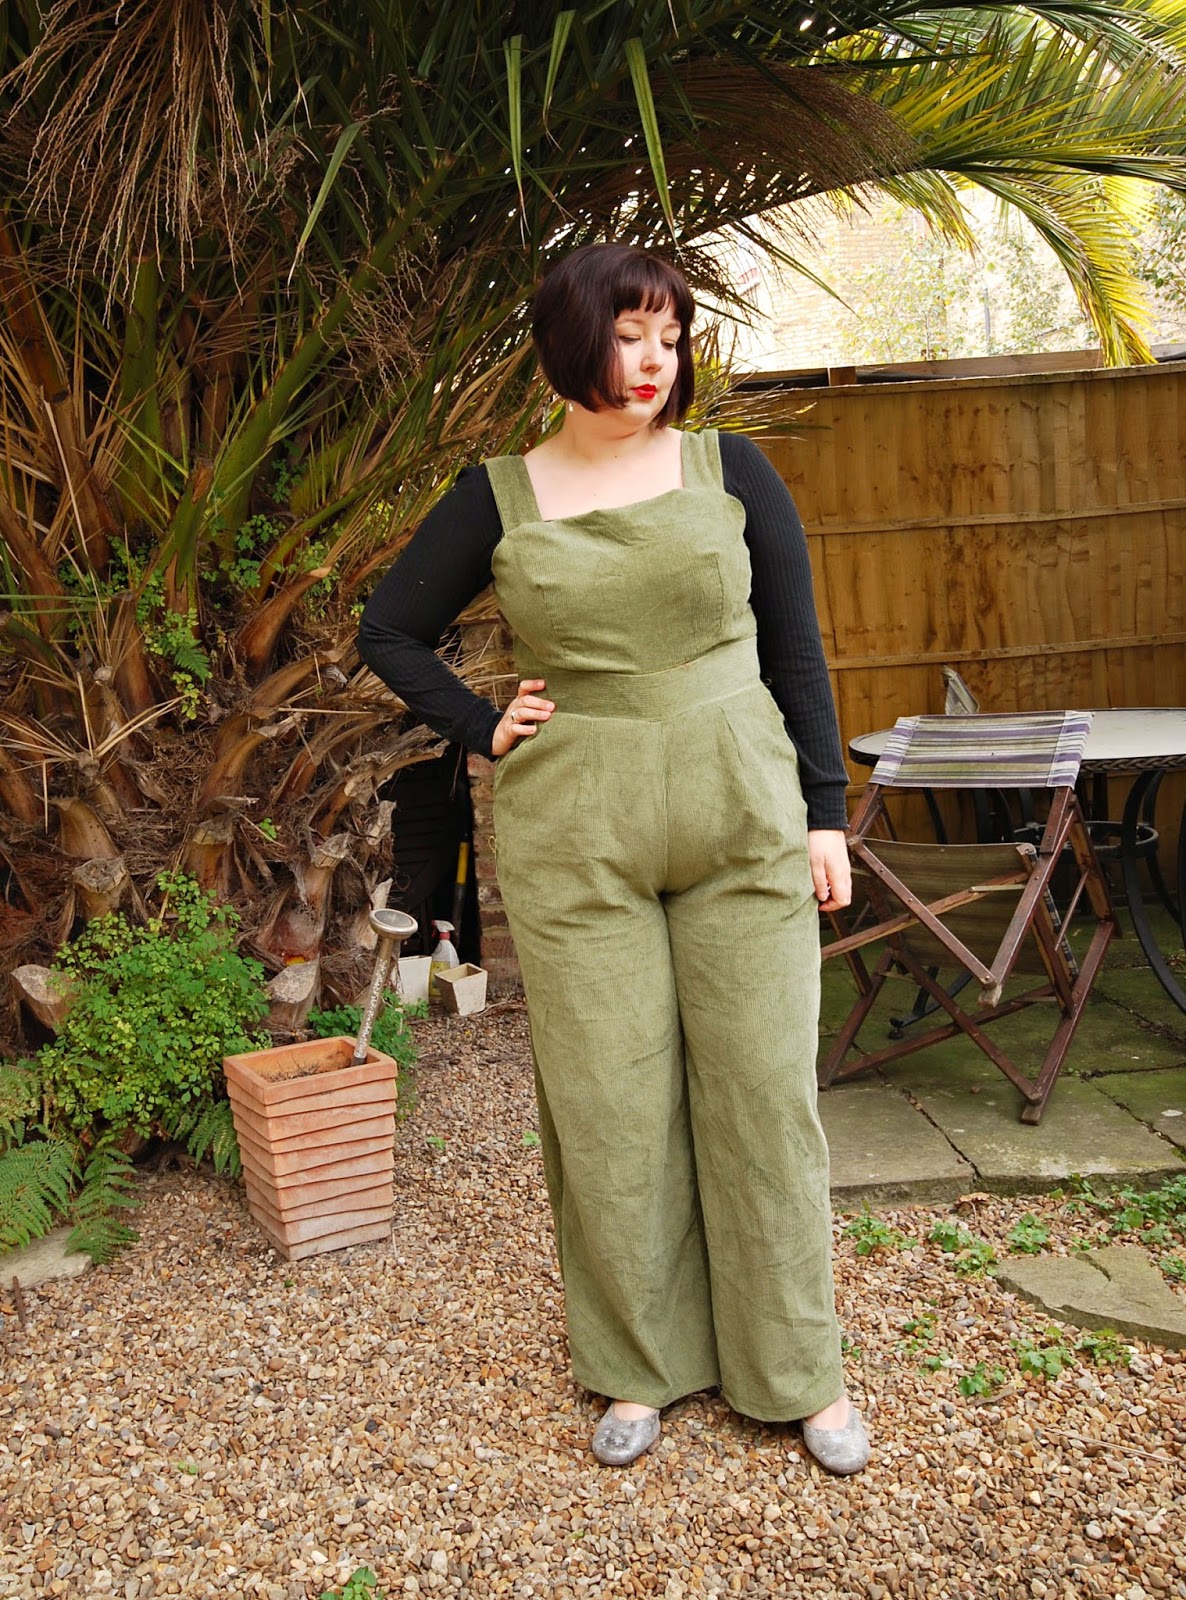
I wouldn't use this kind of thick cord to make this pattern again; it's way too bulky. Putting in the zip was one of the more annoying experiences I've had because there is just so much fabric in the waistband seams. Invisible zips do NOT want to be sewn in straight over four layers of cord and I had to unpick and redo several times. The sample dress on the envelope looks to be made of a corduroy-type fabric, and I don't think it would have ever occurred to me to do this without that picture. It looks great and is a fantastic warm autumn piece, but yeah. Use a thin cord.

This review is going to come off a lot more negative than I mean it to. I really like this jumpsuit and will make it again (I want to try it in a thinner fabric), but there were just a lot of little annoyances along the way. Sizing off, zip insertion annoying, bulky bits, too short in the legs, slightly odd instructions. I'm convinced there must be a less convoluted way to handle the lining, but I'm too much of a beginner to know what that way might be. Sigh.

I'm pretty sure I'll get a decent amount of wear out of this, assuming I don't get too hung up on how much of a departure this is for me style-wise (self-esteem is currently a huge problem for me and I am fighting the urge to just disappear. Wearing a corduroy jumpsuit does not boost one's invisibility, it turns out). It'll be especially good for layering as it gets colder.
My next go at this pattern will definitely be attempting to fix the teal version, and again, advice very gratefully received. I basically need a small amount of extra room in the bum and waist so that it will zip up, and a little bit more ease in the bust so that I can comfortably wear a top underneath it. I WILL do it before the end of the year. I am determined.

Really restrained Josephine Baker-ing for no reason whatsoever!
This looks great on you. The teal really suits your colouring- it’s probably a silly idea and I’m not an expert, but would there be any scope for a darker blue insert in each side, all the way up from the ankle?
ReplyDeleteInserts at the side is a good idea, thanks!
DeleteI would try a triangular insert in the back, a large triangle with the wide end at top and the point slightly below the waist and the zipper directly down the middle. Use the measurements for exactly how much inches in ease you need at specific points.
DeleteRosy is right...if you vant match the teal, find a contrasting shade that works. And usually a shaped gusset but they aren't so straightforward to draft to fit in so just go top to bottom.
ReplyDeleteIt's very cute and LOVE the teal.
ooh and I made a dress like that this summer...can't zip it from the bottom...can't zip it from the top. So annoying!!
I kept the leftover teal fabric and I think there should be enough to make inserts. Thanks for the advice!
DeleteThat teal version looks gorgeous but I hear your pain about the fitting. I've given up on jumpsuits for this reason. Not sure how much teal fabric you have left over but I am now a big fan of the fake jumpsuit - basically making the top and pants separately and just tucking the top in. Would separating them be possible?
ReplyDeleteLove both colors on you, but as a redhead I have a special place in my heart always for teal.
ReplyDeleteAs for fixing the teal version ... I'm worried that adding inserts up the sides from top to bottom will interfere with the pockets.
How much more room do you need to add? Will just un-sewing the back darts (top and bottom) work? If yes, you could either re-cut/re-sew the entire back waistband, which means ripping/re-doing the zip insertion (ugh). Or you could leave the zip in place and strategically rip part of the waistband and add inserts (to match what you let out of the darts) to the waistband only near the sideseams, where they'd be mostly covered up by your arms.
If you need more room than just un-sewing the back darts, how about un-sewing the front darts too. You don't have to remove all darts completely ... just re-sew them all at the absolute smallest you can? We experienced cough:older:cough sewists call this "essence of dart."
I always hope you'll pop up when I'm looking for advice! Taking the darts out probably would give me enough room, I think - I'll try that and see how it goes!
DeleteI hope it works. I did have a face-palm moment, though, after realizing I told you to try removing the front darts ... which could be interpreted as both bust and waist. I'm pretty sure you already know you do actually need the bust darts and not to remove those, but just in case ... :-)
ReplyDeleteI am working on this pattern now. The waistband instructions are VERY confusing. Earlier, on the bodice portion of the pattern directions, the last step is "sew the [bottom] raw edges together; but then tells you to sew the interfaced waistband to the bodice lining and the UNinterfaced waistband to the bodice. I don't understand why it would do that. Any help you can provide that you may have discovered would really be awesome. But then again, you wrote this 3 years ago, so it's doubtful. Anyways, big fan of you for writing this! Nobody else reviewed this pattern that I could find.
ReplyDeleteI'm literally having the same problem right now, its incredibly frustrating. Why is the waistband even like this? It makes zero sense. I doubt you'll see this, but if you do could you offer some insight on what you did? I'm at a loss here
Delete