Showing posts with label vogue patterns. Show all posts

Monday, 8 August 2022

summer sewing: vogue 8814

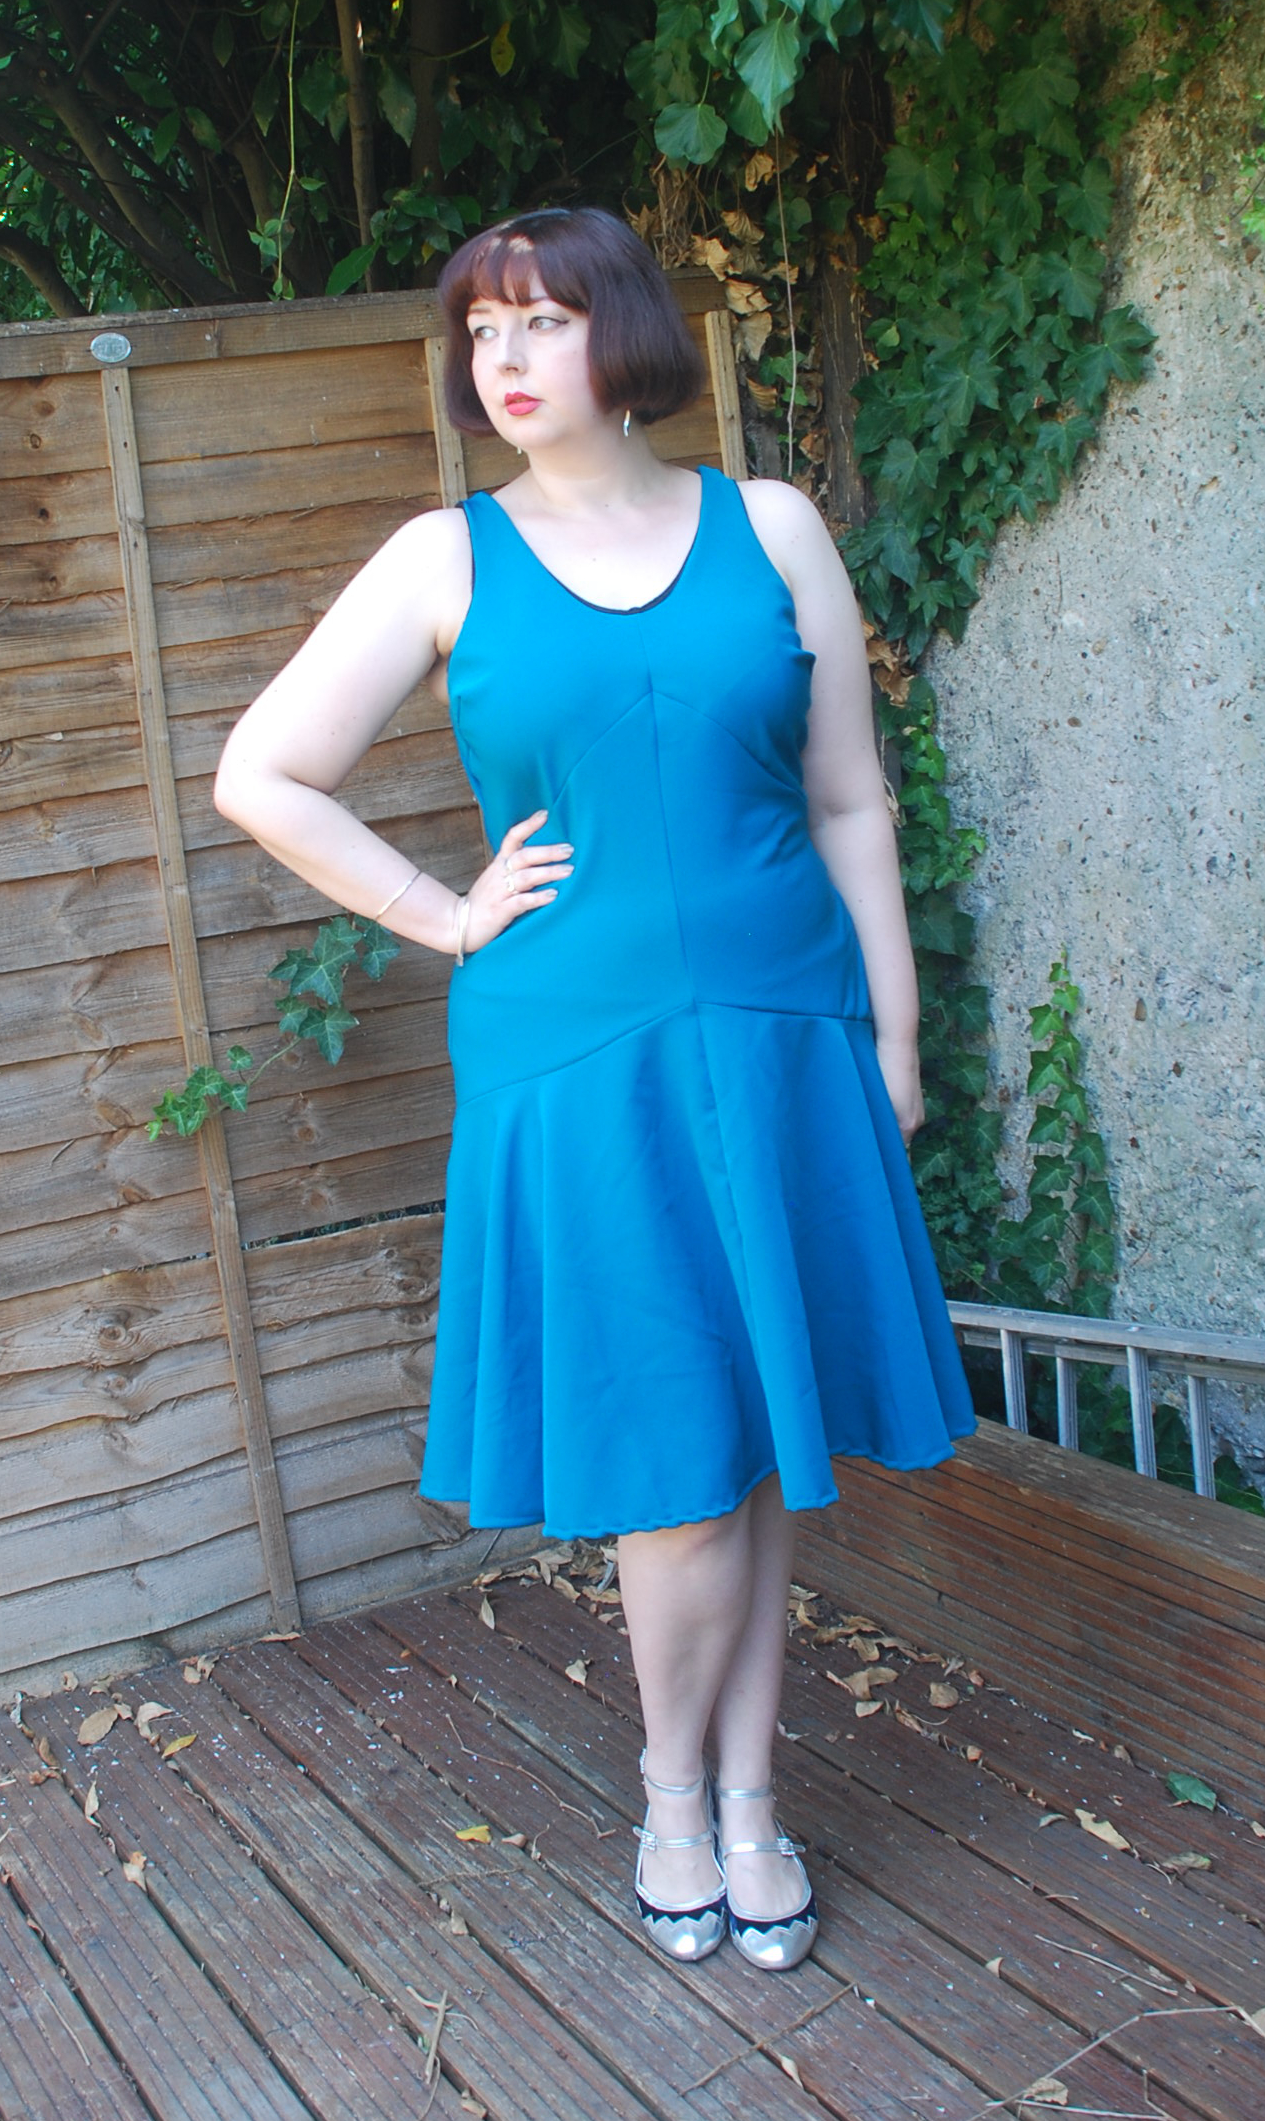
Alright, we're a fair way into August, better post the first one of my summer sewing projects! I'm actually not progressing too badly with them, but the finishing and photographing has been a real pain. I got four things off my WIP pile on Saturday and photographed a bunch of stuff yesterday, when it was way too hot and sunny for such things. First up, one of my experiments. The one I was 95% sure was going to fail miserably.

I will freely admit that I had to put this on in front of the mirror a fair few times before I adjusted to what I was seeing, but now that I have? I'm actually quite pleased. I think this sort of works. It certainly isn't the number one most flattering thing I've ever put on my body in my life, but it's substantially better than I expected. 

I've had this fabric for well over a year now. You may recall it from this post, which is now finally almost done with except that static-conducting microfibre crepe. I bought it without a plan assuming it would have a million uses, but I got completely stuck trying to pair it with a pattern. There's something very bridesmaid about the sheen, and I couldn't shake the idea that if I made one of my go-to dresses from it, I would just look like I got lost on the way to my best friend's wedding. I really wanted it to be something good because the colour is incredible, but nothing seemed right. Eventually I got fed up with it, decided it was going to be used for toiles instead, and cut this out fully expecting it to be hideous.

It's true that if I was suddenly urgently required for bridesmaid duties this weekend, this would not look out of place. But I do think it's different enough to allow me to wear it as just a dress, too. I haven't yet fully decided if I will (mostly because I'm not sure what level of formality and versatility it's at), but I am pleasantly surprised by how this looks on me. 

This pattern - Vogue 8814 - has been in my stash for years and years. I've picked it up and put it down again many times. I love 20s and 30s style but have never really felt comfortable in the silhouettes because I don't have that body type, so my insistence on keeping a quasi-flapper haircut is the only way you'd really know. As I've said several times this year, I've been getting more confident generally recently, which has led to a desire for variety greater than my desire to style myself in conventionally flattering ways at all times, and it seemed wise to jump on that to finally try this pattern.

I did make a couple of changes. This fabric has enough stretch to let me just pull it on, so I dispensed with the zip and made the bodice lining in a stretch fabric as well. The pattern comes with cup sizes but I found that I still had a fair bit of excess fabric at the armhole, so I put a dart in to get rid of it. It's also intended for much lighter fabrics than this one. For me personally, starting off with a heavier and thus slightly more visually forgiving fabric was the correct thing to do. It certainly does lose something in the way of movement and delicacy and general slinkiness, and maybe that will come another time, but for my very first fabric arrow pointing directly at my stomach, something with a bit of a smoothing effect did not go amiss. I also shortened it a couple of inches from the knee-length version, as I usually do. I keep trying below the knee styles, and the consensus is always "that looks odd". 

Construction was pretty easy, though I had moved myself down a few difficulty levels by not picking something super shifty that would have been deeply annoying to sew in bias-cut pieces. I will say this fabric didn't exactly cover itself in glory - it was functionally impossible to press and thus incredibly difficult to sew a decent circular hem. For any future versions of this dress, I would want to do a swayback adjustment and add in a bit more space at the bust. The pattern comes with cup sizes up to D, and I could have done with one or two more. 

This dress and I have a deal that I will, at least once, wear it out of the house. I'm not yet sure where. I'm also not yet sure about the styling - I went full Art Deco for the photos but it's possible I'd find it more wearable if I modernised the shoes. I do think, though, that I actually kind of like this, and I'm quite looking forward to an opportunity to go out in it. 


So, overall, an excellent start to my silhouette experiments. I'm genuinely surprised by how this turned out and I think it'll spur me on to try more new stuff. I don't know if I'll make this exact thing again - I don't think my wardrobe needs two of these - but I'm open to the idea somewhere down the line. 

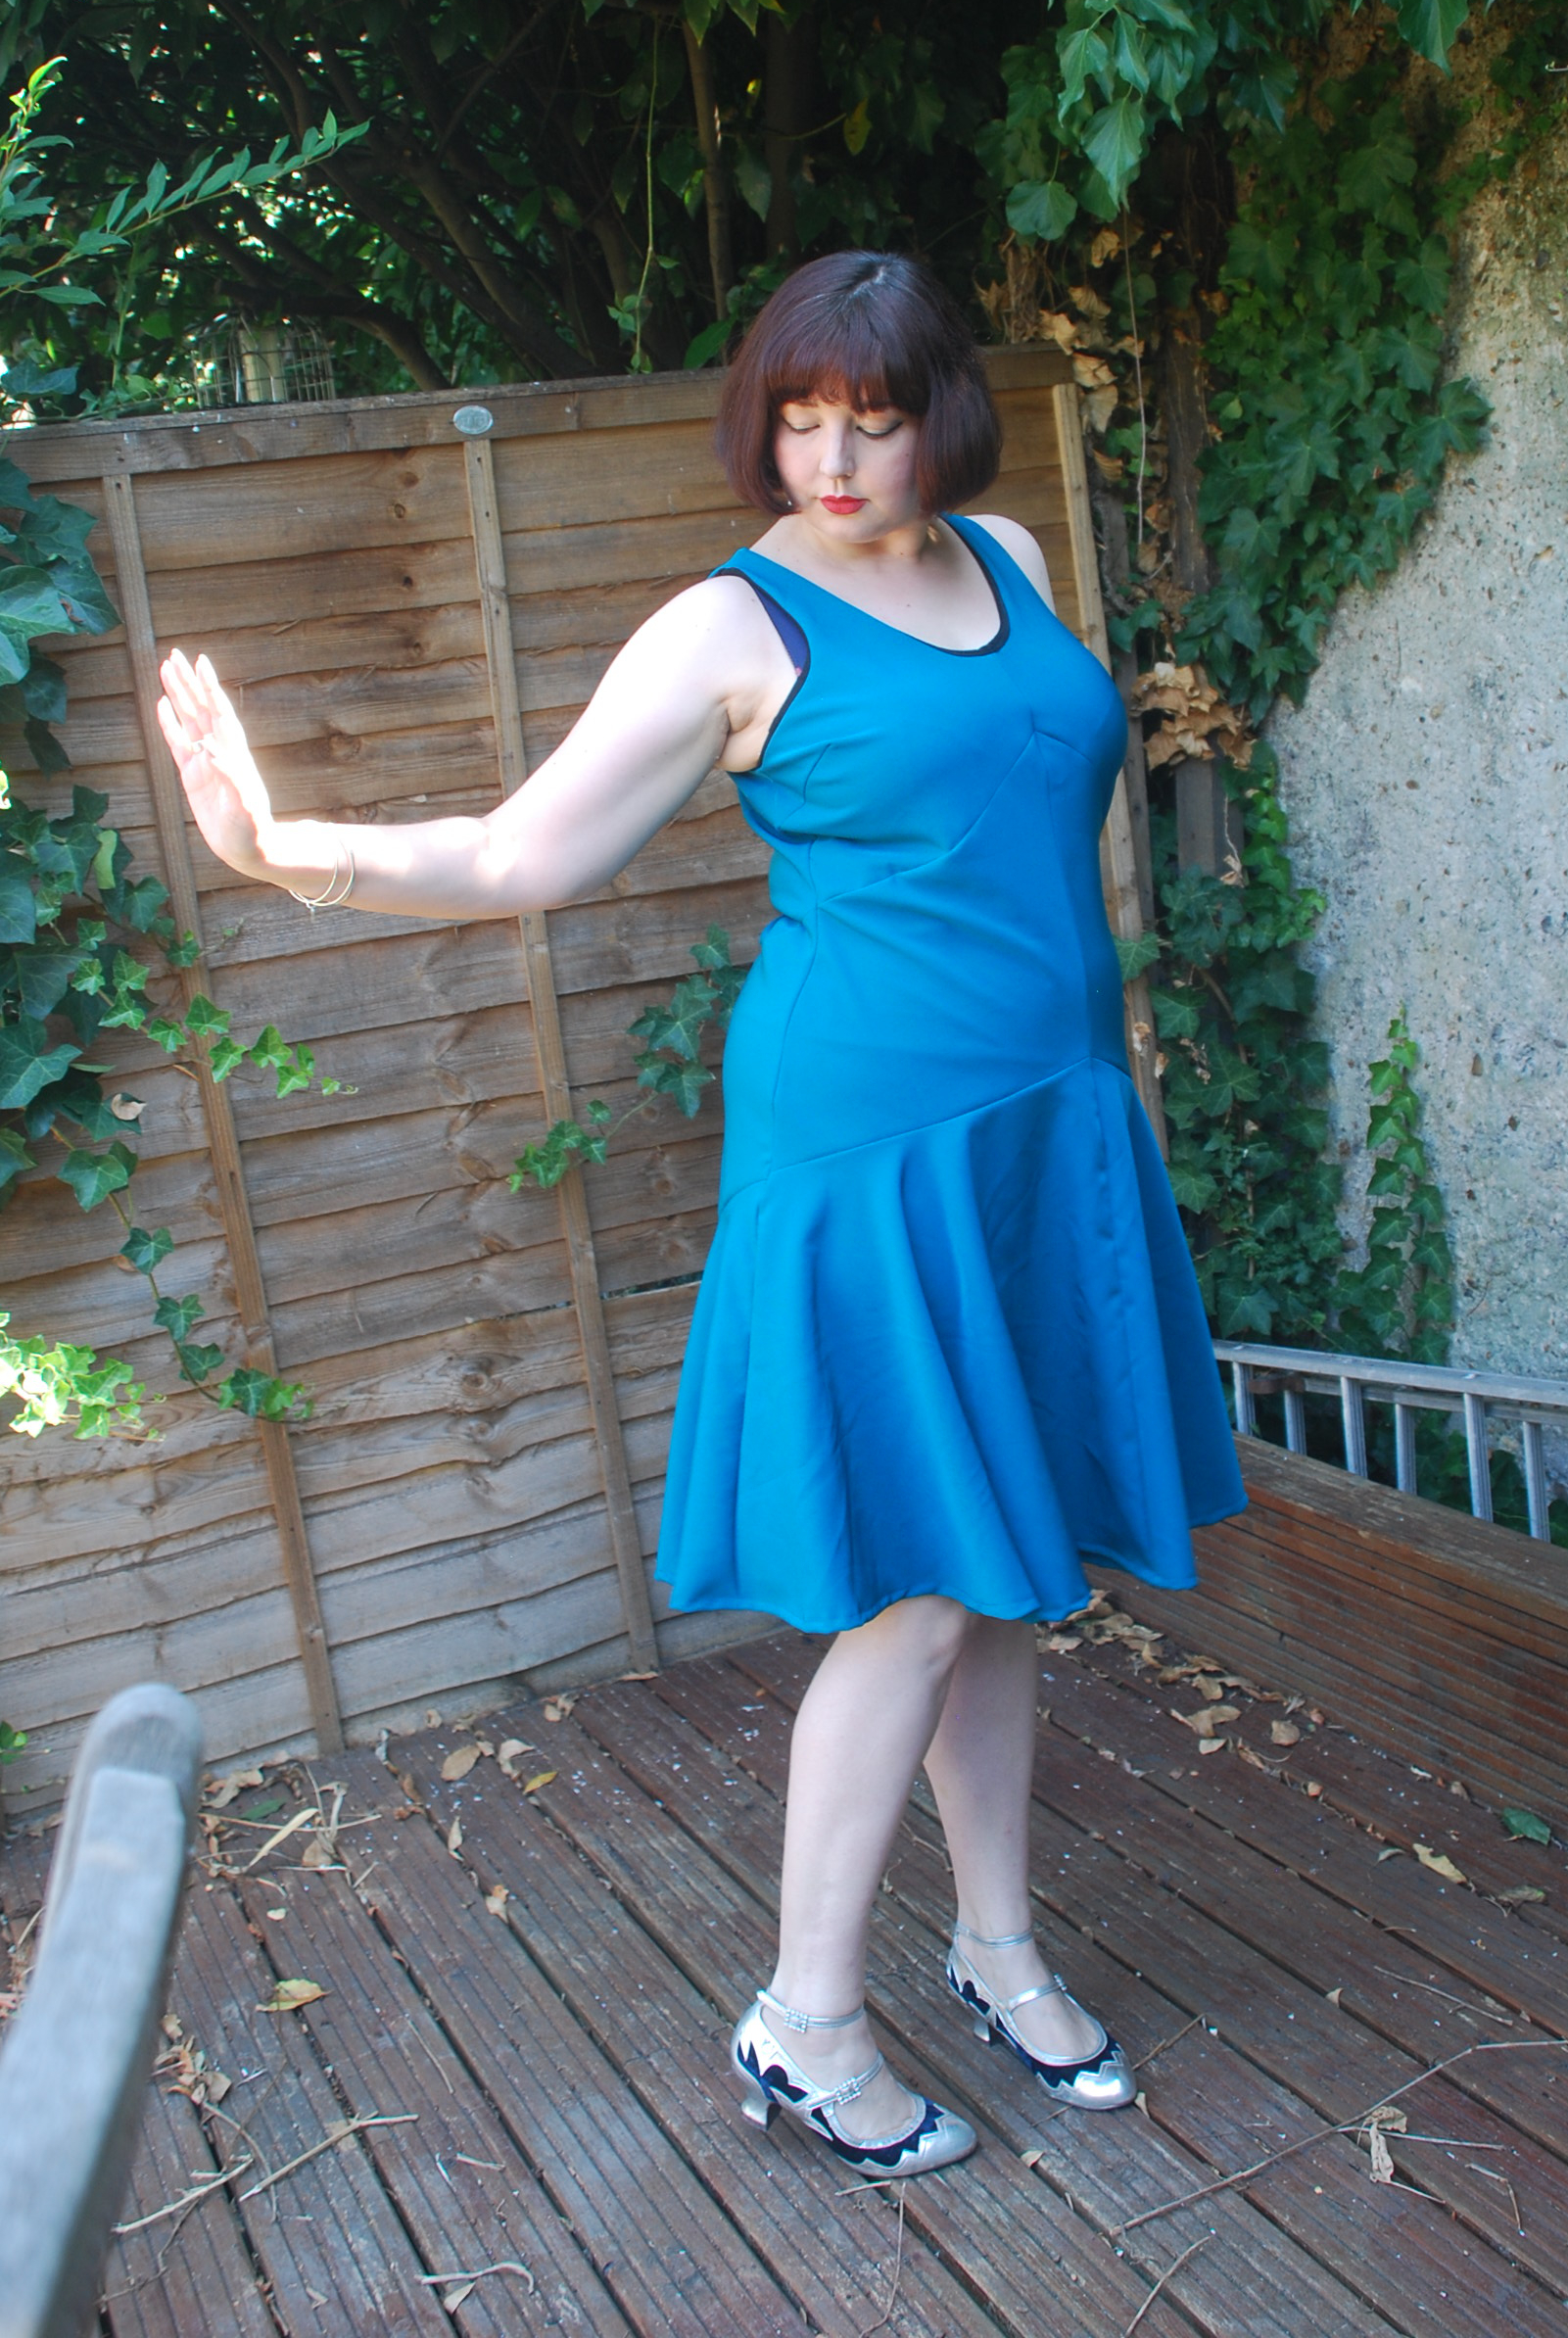
And now, a few pictures of me trying to remember how to do the Charleston:


Up next will either be something else from my plans or something deeply unseasonal, depending on which post I finish writing first. But the photos are taken, so there will be one! 

Vogue 8814

Fabric: medium weight stretch crepe from Walthamstow
Cost: £10 (I paid £20 for 4m and have about half of it left)
Pattern details: Bias cut 1930s dress with dropped waist, full skirt, and back zip. Alternate view with a lower cut front, cross-back straps, and longer skirt
Size: 16 D cup
Alterations: Zip omitted due to stretch fabric, skirt shortened, extra dart added at the bust
Would make again/would recommend: Maybe/Yes

Monday, 9 September 2019

actual shirt attempt: Vogue 9220

I said when I started sewing, and for the three years following, that I would never make a shirt. I haven't worn a single item of clothing with buttons on it since I took my school uniform off for the last time and I don't intend to ever do so again (I fully recognise that this is really weird, but I've hated buttons since I was a small child and my vibe is not the button-up vibe anyway), so I didn't really ever expect to revisit the point.

Last year, however, Patrick made a couple of pouty comments about my resolve to never make him a shirt. He may have been kidding - he would certainly say now that he was - but I do feel a bit bad that I don't make much for him, and the kinds of shirts that he likes seem to have been completely out of production recently. At first I said I'd make him a shirt if he paid for me to do a shirtmaking class, but then nobody seemed to be running them. When I thought about it in a bit more detail, I realised that it wasn't actually that many new techniques - I've sewn collars before, I know how to flat-fell a seam - and it probably wasn't worth paying a couple of hundred quid to get someone to show me how to make sleeve plackets and then talk me down from my buttonhole anxiety. So I resolved to give it a try on my own.


Look at it! It's a shirt!

The pattern we went for was Vogue 9220. Patrick is very particular about his shirts and didn't want front pockets or floppy collars or fake anything anywhere, which narrowed it down considerably, and this pattern had both fit options and cuff options. I haven't seen another pattern for double cuffs, and it's one of his favourite things. I initially said I would start off with regular cuffs and work up to the fancier ones, but decided as I was cutting it out that these weren't appreciably more difficult so I may as well just dive in head first. The shirt comes in standard, tailored, or slim fit, and this is (allegedly) the latter.


The main reason Patrick hasn't been able to find shirts lately is that the prints have been wrong. Again, he's got very particular taste - he likes loud prints, but stylish loud. He wouldn't look twice at a novelty shirt. He's very into Liberty prints, mostly florals and paisleys, and his colour palette is quite specific. While I could find several fabrics that fit the criteria, they were all £16 per metre and up, and I wasn't prepared to spend that on something that was an experiment and could very well be unwearable. I also didn't want to just buy a plain cotton and make him a work shirt, because that's no fun at all (also they're covered by a suit jacket all day and it would feel like a giant waste of effort). I searched for a little while before coming across this viscose at my favourite stall in Walthamstow. Seriously, they have everything. While orange is not one of Patrick's colours, it's sparing enough to work, and though it isn't cotton it also doesn't have any polyester in it, so shouldn't be too sweaty. And at £6 for two metres, I wouldn't cry if (when???) I messed it up. Viscose is very much not the ideal fabric for this kind of shirt, structure-wise, but it was good enough for a trial run.


I got everything cut out and interfaced, then it sat around for a couple of months while I had nerves at it. Finally, in mid-June, I decided enough was enough and got the shirt finished up to the point of making holes in it in a few sessions over the course of a week. And really? It wasn't that hard. The only place I really had difficulty was making the plackets, which was totally new to me and not the easiest thing to comprehend from the brief instructions. With the help of a couple of tutorials I got them to be functional if not especially pretty, and I'll now have a better idea of what I'm doing when I try again. What I should have done was poked about on the inside of one of the many shirts already in the house, but I didn't. Next time. But the yoke, the collar, the sleeves, the flat felling, and the double cuffs all went pretty smoothly. Even my topstitching wasn't too hideous.


At this point I got him to try it on. We decided it was too big in the shoulders and WAY too long in both the body and the arms ("oh, by the way" said Patrick as we were doing this, "I have incredibly short arms"), but that it was still wearable so I should carry on and finish it. You can see the huge folds of fabric on the sleeves in all the photos above, and witness the utter ridiculousness that is the back length:


Look how long that is. It's practically down to his knees. I think it's partly that this pattern runs long and partly that we're using a dress shirt pattern to make a regular shirt because there's no such thing as a regular shirt pattern with double cuffs. Sigh. The shirt then sat almost finished for AGES while I panicked about the whole button/buttonhole situation. I was pretty sure that I'd get the alignment of buttons to buttonholes wrong (spoiler: yep) and that would make the whole thing look like shit. It was well over a month, if not two, before I leapt on a random trailing thread of motivation and got everything finished.


In terms of my first attempt at buttons and buttonholes, it's not hideous, but I did mess up the alignment on the top and bottom buttons. The bottom one I was able to cut off and redo, the top one not so much. We decided it wasn't that big a deal as he never uses the top button on his non-work shirts anyway. I also bought a pack of bog-standard buttons and I really don't like them. Solid white next time.

Me: I mean, you're probably not going to wear this one so I -
Him: [affronted] I will.
Me: But it's way too big.
Him: I will wear it and I will look styling.
Me: But...
Him: I. Will look. Styling.


Once I realised he wasn't budging on this point, I insisted we shorten the shirt to a less ridiculous length. I didn't want to force him into two separate photo sessions, so what you see above is the shirt pinned into place (I have since hemmed it properly, don't worry). Though the sleeves are still obviously too long, it's much better like this.  Look how much less ridiculous the back is now:


This did not go as badly as I feared for a first attempt, but there's a lot of work to be done here. For a start, while this isn't necessarily a bad fit for a shirt to have, it's not how Patrick wears his shirts. This is supposed to be the slim fit cut but there's still a LOT of ease in here. Patrick has narrow shoulders so I always thought there might be a need to go down a size in the shoulders, but a smaller size overall will probably get us closer to the fit he likes. Having done some measuring of his normal shirts compared to this one, I think a decent chunk of the sleeve problem would be resolved if the shoulder seam sat in the right place, but I would still take a couple of centimetres off the sleeve length next time. Patrick also thinks the double cuffs are a bit skimpy and would like more length taken out of the sleeve then added back in at the cuff. I think for this I'm just going to measure the cuffs on his regular shirts and make them that size.


My guess is we'd be adding an extra centimetre to these. Also, say hi to either Alphonse or Ernie (I'm not sure who lives on which side), the massive bejewelled lizard cufflinks I got him for Christmas last year. 

For my own ease of reference, the adjustments I'll make next time:

- size down to a 38, possibly even a 36
- shorten the sleeves by 2cm
- reduce size of dip in back of shirt
- shorten hem by 2cm at the front, 5cm at the back
- increase the size of the cuff by 1cm
- ignore the bit where it asks for different sizes of button for no real reason
- burrito the yoke instead of slipstitching then topstitching and wasting a lot of time


He's pleased, though, so it's okay. 

As I mentioned in my autumn plans, before I make another one of these I want to have a go at the Sew Over It Hackney shirt (sans front pocket, because Patrick thinks shirt pockets are for dweebs). Partly because I downloaded the pattern in my mass Stitch School harvesting session and it would be nice to use it, but also because - unusually for Sew Over It - they provide a full range of finished measurements upfront. Chest, waist, hem, collar, shoulder width, back length, sleeve length, underarm seam. I think that will be really useful in trying to get the fit right. My hope is that eventually I can merge the two into some kind of Patrick Frankenpattern and be able to create the perfect Liberty print shirt by his 40th birthday in March. Which might be a bit of a tall order as Liberty is not looking especially Patricky at the moment. We've had a bit of back and forth over whether a shirt in the same print as my Minoru would work, and he has concluded that he just won't know until there's a shirt of it in front of him. This is not a risk I am prepared to take. For now I've got a navy and white cotton lawn with stripy background and floral foreground (which has now arrived and is eminently shirtable) from Abakhan, and we're going to see how that goes.

Up next: either Pietra trousers or B6621 dress, depending on what I finish first!


Vogue 9220 shirt attempt

Fabric: Japanese viscose from Walthamstow
Cost: £6
Pattern details: Men's formal shirt in standard, tailored or slim fit, with collar and collar stand, sleeve plackets, and regular or double cuff options.
Size: 40
Alterations: None for the first try
Would make again/would recommend: Yes/Yes

Monday, 29 October 2018

autumn sewing: the triumphant completion of my white leather jacket (and bonus Vogue 9199)

Look!


I'm not going to lie, when I got to mid-October and still hadn't even started this I thought it just wasn't going to happen. The test version was super-draining to my sewjo in general, particularly when I realised that it was too uncomfortable to actually wear, and I still haven't quite recovered (as my much less frequent posting has probably given away). When I put it on the list in the first place I knew that making a second jacket so soon would either clear away all the residual YARGH and let me get on with things normally again, or would stall me completely and utterly. And for ages, it was the latter. I made plans for getting everything going again nearly a month ago, made the Magnolia dress and then stopped. A week later I spent the entirety of Monday sitting on the kitchen floor cutting out a dozen things. Two dresses, a pair of trousers, a HUGE pile of jersey tops... and two versions of this stupid Burda jacket. Two. What is wrong with me? But it turned out to be motivation enough to get on with it.


Thankfully, this version is WAY better than the test one. The fabric is much thinner and softer, so it's comfortable to wear and isn't such a pain to do up, the hem isn't wonky, the sleeve heads aren't huge and puffy, and the zip is the right length. Also, all the zips match this time. I bought the front and sleeve zips from the same eBay shop I used last time, but bought the pocket zips in person to make sure the teeth were the right colour.


I bought this fabric from myfabrics.com. I'd been dreaming about it for a few months before I bought it, but I misunderstood the description and thought it was actually embroidered. It's not, it's just a pattern printed on. It's very different from my first fabric - it's a super thin, super soft plastic-like sheet bonded to backing fabric, which seems to be more the norm than the other faux leather, which was just SOLID. Much to my immense confusion, though, the backing fabric is 100% unresponsive to Superglue. It absorbs and dries the glue literally instantly, leaving you with a small hard crusty spot that won't bend. This was a problem I just hadn't anticipated. No glue, no pins, no tacking stitches. I just about managed to get round that for attaching the zips, but for the hem I literally had to resort to tit tape, and I don't think it's worked that well. My third piece of faux leather, also a thin sheet on backing fabric, has no such issues with Superglue, so I don't know what the hell this stuff is made of.


So, having now made this jacket again with some idea of what I was doing and only one major fabric issue to deal with, I feel more confident in saying that Burda instructions really aren't very good. Certainly these ones weren't. Everything I've read prior to this suggested that the biggest Burda point of contention was the lack of seam allowances on the pattern pieces (I get both sides of the argument - my biggest problem is that I cut out/trace on autopilot and always forget I have to add stuff), and instructions were only mentioned as being "sparse". I don't feel like I'm in a position where I need too much hand-holding, so I wasn't concerned. If I get stuck on a thing, there's usually a more in-depth tutorial lurking around somewhere. However, these instructions weren't so much "sparse" as they were "confusing and occasionally outright wrong". At one point it instructs "sew lining to jacket" when what they mean is "sew lining to facing" and they absolutely do not want you to sew the lining to the jacket, because you haven't done the collar yet. I'm also really not a fan of the way they put about three hours' worth of work under a single bullet point. It means things that sorely need diagrams don't get them, and it's really easy to miss out a step. I didn't topstitch the collar and lapels when I was supposed to because it was under the "Hems" bullet point and I'd finished all the hemming. Luckily that wasn't too hard to correct after the fact.


I'm much happier with the overall construction of this jacket, but a lot of the finicky details still aren't great. I don't have a ton of pocket lining showing this time, but you can see way too much zip tape. The stitching line on the lapel isn't quite where it should be because I wasn't sure how to effectively work round the zip stop. The lining is right at the bottom edge of the jacket, presumably because I don't fully understand the hem instructions. Or possibly it's just that the tape didn't work. I've nearly finished version three and I'm planning to put a leather-look ribbed waistband on that one instead of wrangling with the hem again, but there's a horrible, horrible part of me that wants to try making a fourth version, out of a cotton I don't really care about, so that I can work on the techniques in a fabric that will allow me to pin stuff and potentially work out where I'm going wrong.


This is not the most practical thing I've ever made, but I think it's great. I've got a lot of neutral stuff I can throw this over, and also because there are so many colours in the print it actually ties in well with a ton of other colours. I enjoy having the occasional piece of statement outerwear (see also this) and it brightens up the "black top and silver jewellery" phase I seem to be going through at the moment. I do need to make a different style of trousers to wear it with, though, because it doesn't work so well with giant waist sashes.

Also, what I'm wearing underneath:


This is the remade version of the black Vogue 9199 I made last year (I never blogged that one, but here is my original dress), which was super useful but also made of terrible fabric. It got to the point where I was putting it on and taking it straight back off again several times per week because I so badly wanted to wear a simple black dress that would be a good backdrop for accessories, but the actual garment hung so unattractively that I couldn't face wearing it outside. It lost shape within a couple of months and then just became a giant hole in my wardrobe. I've been looking for the right fabric to remake it ever since, and nothing had presented itself until I went to the Knitting and Stitching Show a few weeks ago and found Stoff & Stil selling precut lengths of very black, very substantial ponte. So I bought one. In hindsight I wish I'd bought three.


Full disclosure: the fabric is not 100% perfect for this dress. It's got the thickness, the colour and the stretch, but not quite the drape. It's a quibble not a dealbreaker, but it does mean I'm not going to buy the fabric in every colour it comes in to buy more. (I am, however, almost certainly going to buy more of this exact stuff to make some smart-looking slim fit jersey trousers, which I didn't know I wanted until I saw this fabric.) I adore this pattern, but fabric choice is absolutely key to making it work. I've made more than one version of this dress which were totally unwearable because the fabric was a tiny bit wrong. Not quite enough stretch, not quite enough thickness, not quite good enough recovery. 


You can see above that I ended up doing a vaguely high-low hem on the skirt. I feel like this dress needs to be mini-length on me - more than once I've cut the pattern pieces longer to make a more versatile dress, and every single time I've cut it right back off again because it just looks frumpy. However, if a skirt has any amount of flare or fullness whatsoever I need to be careful about how short I make the back, because I have got a LOT of ass. In a fabric like this that doesn't have a ton of drape, if I made the skirt mini-length all the way round (even making it longer in the back so that the hem looks even when it's on) there's not enough fabric to cover my bum and then drop down straight again, so it just kind of stays sticking outwards, resting precariously on a bum-shelf that then opens the door to a world of potential wardrobe malfunctions and embarrassments. So after a couple of hours of pinning and re-pinning the hem to see if there was a happy medium place, I just gave up and went for the look I wanted in the front and the coverage I wanted in the back. It's a tough world for a super-curvy woman who actually really likes the shape of her thighs. 


I think I'm going to get year-round wear out of this dress. It's a great shape for me, it goes with everything, and I can wear it with bare legs or extra thick black tights and boots. It does make me want a bunch of really long silver necklaces, which I now don't feel like I can go out and buy because I can make simple silver jewellery myself. Maybe if I get a few different lengths of chain and work out a set of themed pendants? I don't think I have enough time left in my current intermediate class but I could probably book a studio day at some point. 


Next up: for the first time in ages, I'm actually a week ahead of myself in posts, so I'll have a pair of trousers and a top to show you next week! Hopefully I can keep the momentum up now that the stupid jackets aren't hanging over my head. 

Monday, 9 April 2018

a really late winter sewing wrap-up

For obvious reasons my winter plan was a bit of a misfire. My original intention when trying to get my sewjo back was to just cut my losses, forget the whole thing and move on. Then I decided I'd make a few of the projects I wanted the most, but leave it off the blog so I didn't get bogged down in it. I got those things done at the beginning of March and tried to put it to one side, but since then there's been this bizarre creeping dread when I come to post, like I haven't handed in my homework and the teacher's about to find out. Who is the teacher in this scenario? I have no clue. Nevertheless, we must give in to the invisible boogeyman and do a wrap-up post.

Overall I managed seven things from my original list; two during the actual season they were meant for,and another five at the beginning of last month. The rest have been jettisoned for now - I might come back to some of them at a later date, but for now I've given myself permission to ignore them. Results for the five I did make are... mixed, as you're about to find out.

(Also, my dental work has been extended into at least three separate operations, so THAT's a joy.)

Deer & Doe Lupin jacket


This was absolutely a success. I don't have much more to say about the pattern; it's still great, I still love it, I will still probably make it again. This kind of minky-pink suede wouldn't normally be my thing, but it's a perfect colour for a jacket - it goes with almost everything while still looking a bit more imaginative than a true neutral. I lined it with the leftover bird lining from my Rumana coat so it'll be nice and soft to wear over short-sleeved tops and dresses once spring bothers to turn up. It's living in the wardrobe for now because it's too cold to abandon my big coat and too wet to risk going out in suede.

Vogue 8888 dressing gown


This one probably does warrant its own post, but I just feel so uncomfortable in it that I can't bring myself to take a load of photos. I'm not sure my assessment of the pattern would be accurate anyway, because I just hate this. It's too small at the hips so it won't stay closed (as I'm sure you can see), the fabric was a nightmare to sew and press, and even though I spent quite a long time French seaming everything and making it pretty inside, once it was done I said, "oh, thank God for that", threw it on the floor and put my boyfriend's old towelling robe back on. I will have another go at a dressing gown, but not this pattern and not for a while. Turns out I really hate sewing shawl collars, and doing it four times in the last few months has done zero to desensitise me. Shawl collars can bite it, as far as I'm concerned. 

Jersey pyjamas


I LOVE these. They're the trouser part of the Closet Case Patterns Sallie jumpsuit with an added elasticated rectangle for the waistband,and they're the best item of loungewear I've ever made. I wear them constantly at home, and I take them with me whenever I go away, even if it's only for a night. I will definitely make more, and possibly also make a pair I can wear outside. Fabric was an impulse buy from a Sew Over It remnant sale that I really didn't know what to do with once I got it home, but it's perfect for this. (The top here is part of a continued experiment to come up with a knit top sloper -  still a work in progress.)

Simplicity 1370 skirt


I tried this twice and I don't think it's right for me, simply because of the way I'm shaped. This one was way too big and fell down when I walked...


...and this one looked perfect but rode up at the back when I walked, to the point where a stranger had to tell me my ass was hanging out. I think the pattern itself is really nice, but it's not for my small-waisted giant-assed self. I'm currently working on adapting another pattern, which I'll post about when I've finished my second attempt. 

That's everything from my winter plan that I intend to make for now, except the Victory Patterns Esther trousers which I will do a separate post about. I hated them when I put them on, but they somehow look really good in all the photos I've taken, so I'm going to mess about with the pleating and see if I can make myself like them more in person. I'm going to do a quick and dirty planning post on Thursday, which will hopefully lead up to a proper pattern review next week. Fingers crossed.

Monday, 14 August 2017

the very mild experimentation series: a chiffon kimono jacket

(I thought I'd scheduled this for last week, but apparently I didn't. Oops.)

Learning to work with chiffon has been on my mind since I started sewing. I actually bought a piece on one of my very first raids of the remnant bin, but got rid of it six months later when I realised I didn't know what the eff to do with it. Not in the sense of "oh God, I can't work with chiffon, I'm rubbish", more "oh God, why did I buy this print that would only look right on a Masonic wife tightly sipping a glass of sherry and glaring at anybody under 45" (I'm a Mason's daughter, just trust me on this). I didn't buy any more to replace it because by that point I'd stopped remnant bin raids and started looking for stuff I might actually wear, and that rarely includes chiffon.

But then June hit, and temperatures of up to 34 degrees were mentioned.


I bought this particular piece of chiffon from The Textile Centre at the end of last summer. I had grand visions of a flowing layered maxi dress, and only recently admitted to myself that a) I didn't have anywhere near enough fabric and b) the dress in my head would almost certainly require complicated underwear arrangements, meaning I just wouldn't wear it. Fuck strapless bras. The idea of the kimono came to me when I was trying to find something to throw over my shoulders that wouldn't also cause me to sweat to death, and I realised I had a gap in my wardrobe.


The pattern is the Sew Over It kimono jacket, which I've made several times before. I still have and get tons of wear out of one of the two I made for myself, and I've made several more as presents since. It seemed like a good first-chiffon project because it's just a bunch of straight lines. I wanted a little bit more flow to this one, so I cut it longer (I'm not sure how much longer, just as much as the fabric would allow). The insides are French-seamed, and the hems are scratty. Next on my to-do list: learn how to do a half-decent rolled hem.


(I call this the "holding arms out awkwardly" series.)

I had very definite ideas about how I wanted to position the flowers, and due to the way the flowers were laid out on the fabric it wasn't all possible. The most important thing for me was to get a large flower cluster slightly off-centre on my back, and the way I had to fold the fabric to do that meant there wasn't as much choice as I'd have liked for the rest. I wanted flowers on the front pieces, but not in identical layout, and a plain black collar piece, so I did that as best I could and then the sleeves just had to be cut from whatever was left. 


I think this is cute. However, I wasn't getting quite as much wear out of it as I'd hoped, so I bought a semi-acceptable black jersey from Fabric Land and made another V9199.


I really like the way this looks over an all-black outfit, and it's making me want to make some black shorts (which I'm not going to do unless it's a pair of tailored wool shorts to wear over tights in the winter, and there's no way on earth I'll be wearing chiffon in the winter). The dress is only a couple of weeks old, but I've worn it like this a couple of times when the weather allowed, i.e. when it wasn't pissing down with rain in the middle of bloody August WHY IS THIS A THING, and it's cool and breezy and stops my arms sticking to themselves, so it does the job. 


This is the dress on its own. I don't like it as much as my stripy one, mostly because the fabric isn't quite right. Also it's too big in the back, but I'll take that in next time I have black thread in my machine. I screwed up my first attempt at the neckband, so I just cut it out, meaning that the neckline is a little bit wider. It doesn't bother me at all, but I won't go out of my way to do it again. 


The dress is okay, and I will get some wear out of it. The kimono is also okay, but very much for hot days and holidays, so I probably won't wear it a huge amount, but will keep it for next summer. Chiffon was exactly as annoying to work with as everyone says it is, and I probably won't be using it again in a hurry. I will if I'm inspired to, but for something I'm not bouncing around with excitement about, I don't think it's worth the faff. 

Next week I'm doing my autumn sewing plan a little early, to give me time to give Mum her dresses and photograph them on her properly. I'm a bit nervous about the fit, but mostly I'm just happy I got them done with time to spare. 


Smugface!