I'm finding that the things I'm motivated to do at the moment aren't necessarily the most useful ones, but this one really is a bit of a head-scratcher.
Not only did I choose to go with a toile of a spring jacket, i.e. the thing that should have been right at the bottom of my priority list, but I also decided to make it out of the most expensive per metre fabric I own. Weird. If you were reading last year, you may remember
this post where I canvassed for ideas to use up stash fabric I didn't know what to do with. I got a lot of great ideas from people, including the suggestion to turn my super-expensive fabulous quality Ray Stitch barkcloth into a cropped jacket. The second I read that, my mind was made up. I did consider making a toile before I cut into £50 worth of fabric, but the mere idea turned my brain into a full-on Kevin the Teenager because I do sort of resent this fabric. I was extremely depressed when I bought it and every time I look at it I wish I hadn't spent so much money on it. That was three and a half years ago now, and the money I spent on it is long gone. At this point the fabric either continues to sit sadly in my stash or it gets cut up and makes at least a modicum of use of itself.

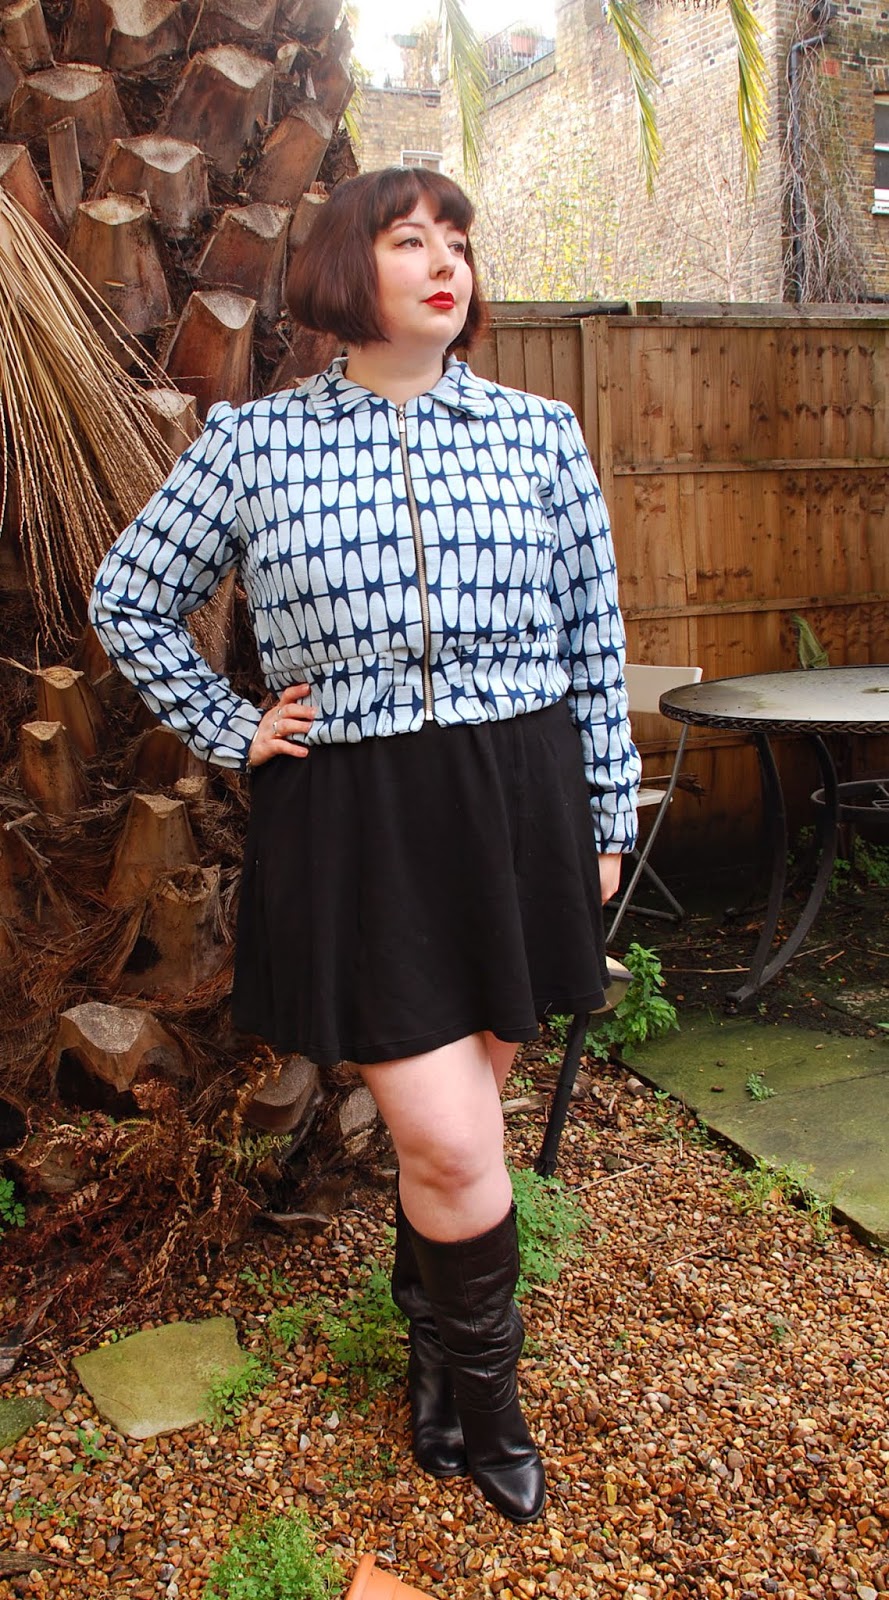
Fortunately, it is not a fail! I was almost 100% convinced it would be, because expensive fabric and untested pattern I also had some doubts about (we'll get into that), but it's worked pretty well! I will definitely get some wear out of it, although I've yet to work out exactly how versatile it's going to be in terms of colour and shape.
For this fabric, which is a very loose weave and thus frays at a rate of knots, I wanted to go for a jacket pattern with a lining. The Sew Over It Amelia jacket was the accompanying pattern for an issue of the now-defunct Lisa Comfort magazine, and when it came out I remember thinking that I liked the look of the pattern but was absolutely not going to pay £14.99 for Lisa Comfort magazine. When they reduced the price to £5 to clear out their remaining stock I decided to go for it. I had fully intended to put the actual magazine straight in the recycling, but it turns out you can't do that because that's where all the instructions are. So now there is a Lisa Comfort magazine sitting in my flat for my boyfriend to periodically make fun of. Hooray.

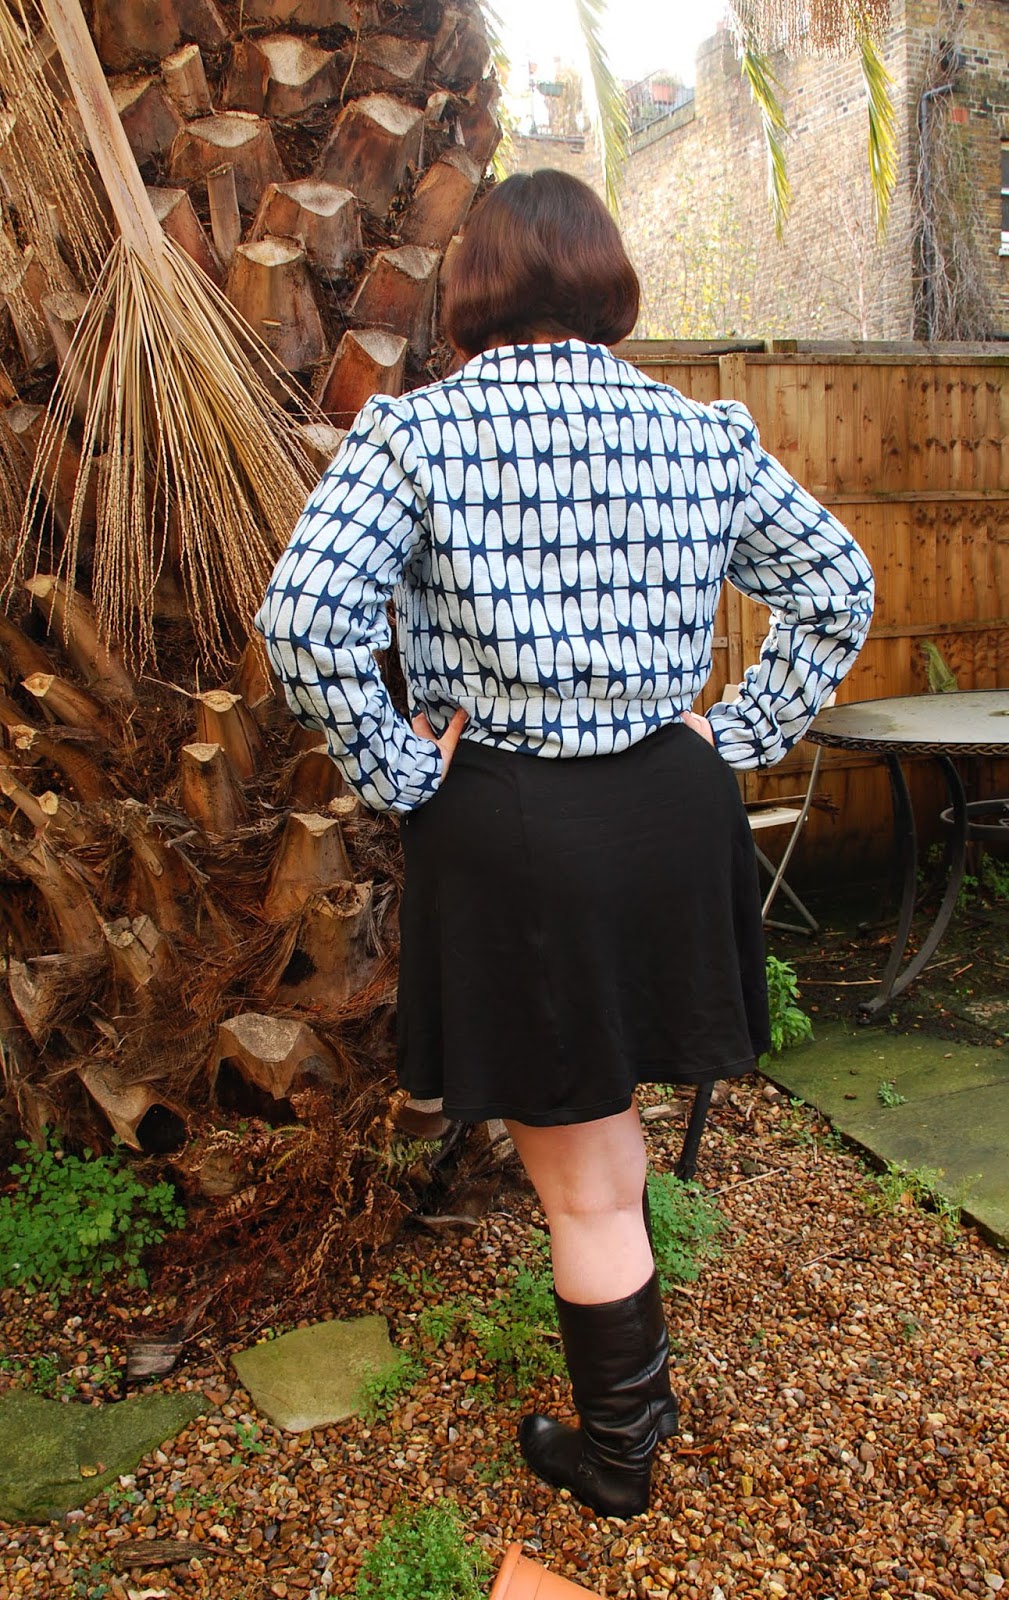
I cut a 16, blending to a 14 in the shoulders and forearms. I didn't do a full bust adjustment but I did do a full bicep adjustment - past experience has taught me that the SOI block has very narrow sleeves. I also added a couple of inches of length, partly to compensate for my boobs but mostly because my 18 inch zip was nicer than my 16 inch zip. Turns out this was exactly the right thing to do, as this jacket is SUPER cropped. Which is good! I spend large chunks of my life looking for actually cropped jacket patterns rather than ones that hit my high hip and look like shit on me! But if you have a large bust or a long waist, take note - SUPER cropped.

The zip, incidentally, was a major annoyance for me. The notions requirements say "We recommend buying a 22-inch zip and shortening it". First of all, no. Second of all, shortening it to what? What length of zip did you draft for?? I really hate this kind of thing. This made me very concerned that they'd drafted for, say, 21.25 inches of zip or something equally unpurchasable, but I pressed on. My jacket, as I said, ended up needing an 18-inch zip after I lengthened it. To make this jacket as drafted you'd have to take six inches' worth of teeth out of the zip, possibly more if you're making a smaller size. There is just no way that a 22-inch zip is the most convenient one to purchase. They suggest it's to give you leeway to make alterations to the fit, but I'm not buying that. Who is making six inches of alterations to a cropped jacket? Aside from that, adjusting my notions based on the alterations I make is my business, not the pattern's, particularly when the pattern does not contain any instructions for adjustment. Just tell me it's a 16-inch zip and let me do my thing, yeesh. Also if you work in either metric or imperial exclusively, this pattern will be very annoying to you as it skips in between the two constantly, as only British people of a certain age can. At one point it told me to subtract 2.5cm from my 22-inch zip.

The jacket has wide elasticated cuffs and an elasticated waist, the instructions for which I did not pay attention to. I feel like there's a lot of unnecessary slipstitching in this pattern, and I rejigged the instructions until I didn't have to do any of it. The instructions for the cuff elastic in particular I found baffling; they have you leave a hole in the cuff's seam, attach the cuffs to the sleeve, go ahead and make the rest of the jacket, then insert the elastic into the hole with a safety pin, yank both free ends out and sew them together, then slipstitch the hole closed. I just sewed the cuff, sewed the elastic, put one inside the other and carried on. This is how I did the cuffs on my Minoru jacket, which are basically identical to the ones on this pattern, and I do not understand why you'd do the stupid slipstitching method when this is easier, faster, and gives you a cleaner result.
(It's my very strongly held opinion that commercial patterns should try and avoid hand sewing wherever possible; I'm all for people going full steam ahead on the couture techniques if that's enjoyable for them, but neat and secure hand sewing is actually really difficult and requires being taught properly. A lot of my earlier projects had a much shorter shelf life than they could have because nobody told me you could attach lining to zip tape by machine.)

One thing I did like about the construction is that it's very easy to fit as you go. I've made jackets before where you have to get quite a long way in before you can see if the size is right, but on this one you have a vest with a working zip very early on in the process, so you can take in or let out as necessary. (The instructions say to make up each lining piece after the corresponding main piece, but that interrupts my flow so I just put the whole lining together at the point when I needed it. If you are following the recommended method the zip will be a slightly later point in the process.) I didn't need to alter anything, but was very glad to have opted for the full bicep adjustment.
I also really like that the lining includes a facing, so I can wear the jacket halfway unzipped as I prefer without having to worry about lining co-ordination.
Other things to note: the sleeve heads have to be gathered to fit the armscye, which is not my favourite detail; the pattern does not come with pockets; and the instructions needed a little bit more work. They aren't terrible or unusable, but the photos aren't that helpful and the bullet points are all on top of each other with no line spacing. Also, I don't feel there's enough information in the instructions to justify the sheer amount of them. In this format I'm actually pro lots of instructions - generally the people making a pattern from Lisa Comfort magazine aren't going to have a wealth of expert knowledge at their fingertips, and with that much space I would have liked to see explanations of things there isn't normally space for in instruction leaflets, like attaching the cuffs by machine (
here you go). As it was, a huge chunk of the bullet points were dedicated to attaching the waistband, and it just doesn't need that.

I'm not generally this critical of a pattern that produced an end result I liked, and I've gone through my review several times wondering if I should take stuff out or soften things a bit. However, if I were a reader considering this pattern, all of these things are things I would want to know about in advance. Having read these things, I might still go on and make this jacket (it's hard to find cropped jacket patterns and they're the only jacket patterns I'm interested in) and I would have a much less annoying time as a result. My main problem, I think, is that I didn't really enjoy the process of this one, and so it's harder to find joyful words. I'm hopeful that when they do release this pattern as a main line SOI one, they'll redo the instructions and maybe even some of the techniques, leaving a much better pattern for other people to have a much better experience with.
I will almost certainly not make this a second time, though I may try and mash it up with an unlined jacket at some point in the future.
(Things were happening through the window. I apologise.)
I'm not exactly sure what will be up next. My sewing area has sprung a ceiling leak AGAIN so if they decide to fix it properly this time I will be out of commission for a little bit while they cut large holes over the Gnome's head. Also I saw Cats at the weekend and frankly I'm having trouble thinking about anything else. But something else will be coming soon, as soon as my flat and my brain are straightened out a bit!
Sew Over It Amelia jacket
Fabric: Organic printed barkcloth from Ray Stitch
Cost: £50
Pattern details: Fully lined cropped bomber jacket with flat collar, zip front and elasticated waistband and cuffs
Size: 16 (14 shoulders and sleeves below the elbow)
Alterations: Lengthened by 1.5 inches, 1 inch full bicep adjustment
Would make again/would recommend: No/No